An empty yard holds untapped potential, but turning it into a functional garden takes more than enthusiasm and a weekend. You also need to know what happens between bare ground and the finished garden to unlock that potential.
The garden renovation process follows the same sequence every time: planning, council approvals, site preparation, framework installation, and planting. Miss a step or jump ahead too early, and you’ll spend money redoing work or waiting for permits while plants sit in their pots.
This guide covers the garden renovation process from start to finish. You’ll learn what each stage involves, how long it takes, and what happens if you rush ahead before you’re ready.
Let’s get into it.
Planning Your Dream Garden: Where Every Renovation Starts
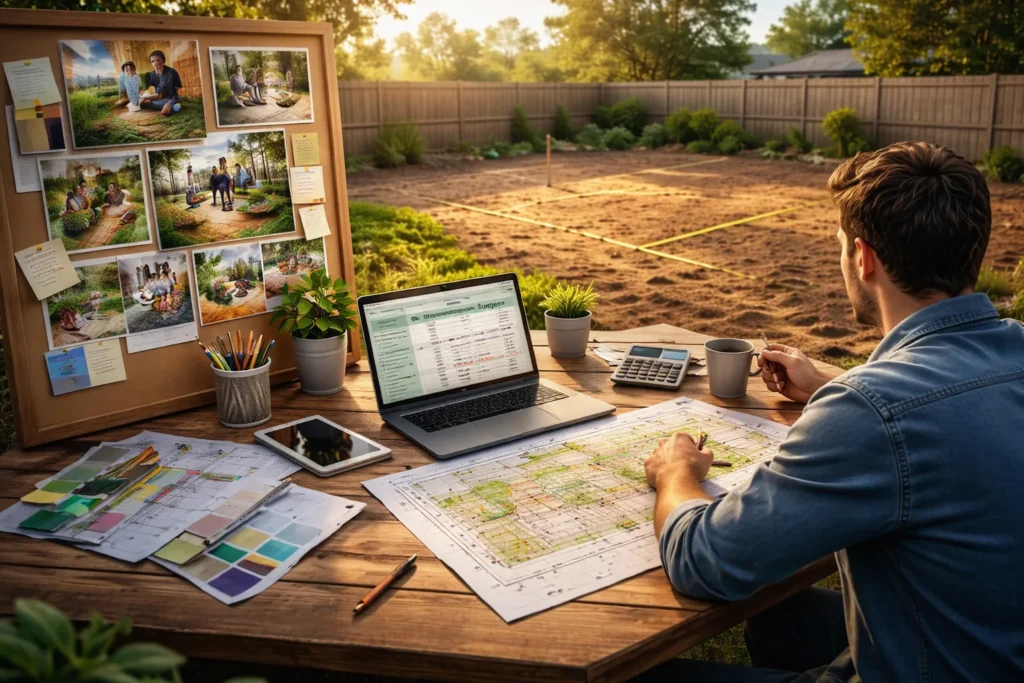
A garden renovation process starts with measuring your outdoor space, setting a realistic budget, and sketching a design that fits your family’s needs. And proper planning prevents expensive mistakes before you buy a single plant or paver.
Start by taking accurate measurements. Grab a tape measure and note your yard’s dimensions, including existing structures like sheds or fences. Sketch this to scale on graph paper or use a simple drawing app.
Next, set a realistic budget. You don’t want to fall in love with a bluestone retaining wall design only to realise timber sleepers are all you can afford. The cost of your garden renovation can vary depending on the materials and features you choose. A simple lawn and garden beds won’t stretch your budget like adding patios and outdoor lighting.
Finally, list what your family actually needs from this space. Think about who’ll use the garden and how. Kids need play areas, cooks want herb gardens, and entertainers need outdoor dining spots.
Writing down your needs keeps you focused on must-haves instead of buying random features that look good but don’t fit how you live.
Sorting Approvals and Deciding What’s Worth Keeping
Imagine building that dream pergola over three weekends, then getting a council notice saying you need to tear it down. Sounds far-fetched, but it happens a lot. That’s why checking what needs approval should be your first move.
Most councils need permits for pergolas, retaining walls over 1 m high, and structures built near your fence line. The rules vary depending on your location and what you’re building. To check what applies to your project, visit your local council website.
Some projects also need engineering certificates or detailed plans before the council gives the green light, especially for retaining walls or major excavation work.
While you’re sorting paperwork, decide what’s worth keeping from your current yard. For instance, mature trees that took decades to grow aren’t worth removing unless they’re diseased or dangerous. Old brick edging or quality paving materials, on the other hand, can be reused in your new garden design to save money.
The Big Clear-Out: Removing Old and Prepping Soil
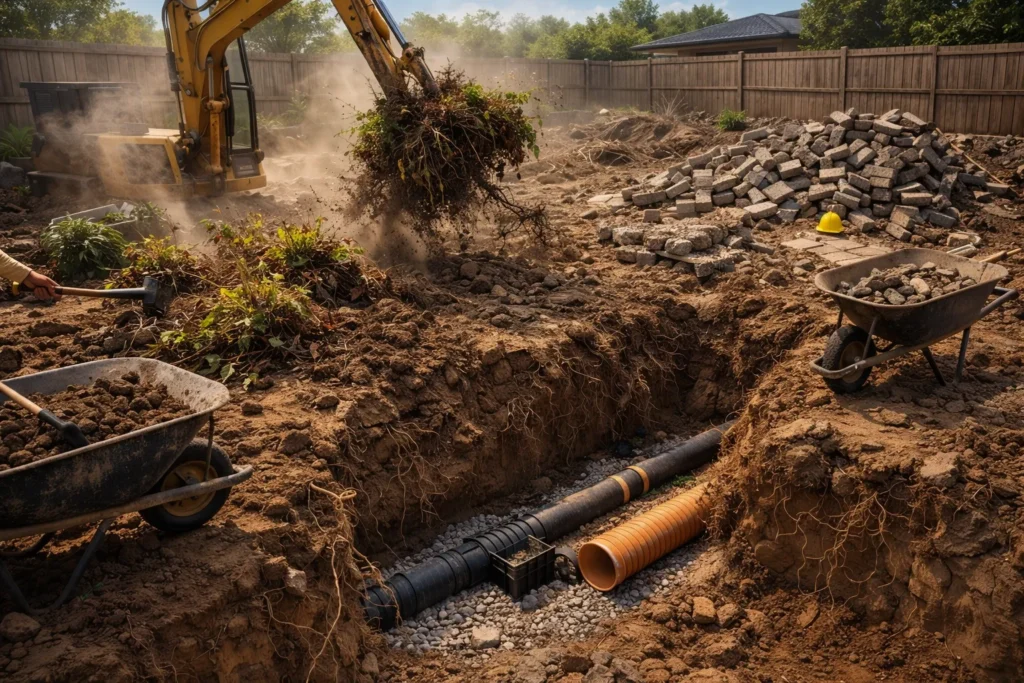
You spring clean your house once or twice a year, right? Your small backyard needs the same treatment before a new garden goes in. Otherwise, your new plants might end up fighting compacted soil and dodgy drainage the whole time.
First off, rip out old plants and paving, then dig down about 50 cm. This gives you fresh ground to work with rather than soil that’s been compacted for years. You’ll also expose leftover roots from old trees or shrubs that need removing, since buried roots can strangle new plants as they grow.
Digging this deep lets you fix drainage while the ground is exposed. Without it, water can pool and cause root rot, killing plants faster than pests or diseases. Even drought-tolerant species struggle if water doesn’t drain properly, so install drainage pipes or shape gentle slopes to guide runoff before refilling with soil.
After drainage is sorted, replace what you’ve removed with a quality garden mix. Fresh soil gives plants the nutrients they need to establish quickly without fighting depleted ground. This is especially important for raised beds and vegetable gardens, where soil conditions directly affect growth.
Hard Landscaping: Building Your Garden’s Framework First
Have you ever watched a landscaping crew and wondered why they spend weeks on paths and walls before a single plant goes in the ground? Hard landscaping creates the bones that hold everything together.
Skip this step, and your garden ends up looking like random plants scattered around, with nowhere to actually walk or sit. That’s why most renovations put these core structures in place before any planting begins:
- Paths and Edging: When mates come over for a barbecue, they need somewhere to walk without trampling through your garden beds. Laying paths first gives you access routes for wheelbarrows and equipment during the rest of the build. As for edging, it keeps your lawn from creeping into garden beds over time, which means less constant trimming.
- Retaining Walls and Raised Beds: Tackle these next if your yard slopes or water pools in spots after rain. They create level areas for planting and stop soil from washing away during storms. Raised beds are also kinder on your back and let you start with fresh soil rather than whatever rubbish is already there.
- Structural Materials: Your choice here (timber sleepers, brick, or bluestone) sets the visual tone for your entire outdoor space. These materials hold everything together through every season, even when plants die back in winter.
Getting this done before planting saves you from trampling new garden beds while mixing concrete or dropping heavy pavers around.
Choosing Plants That’ll Thrive Year-Round
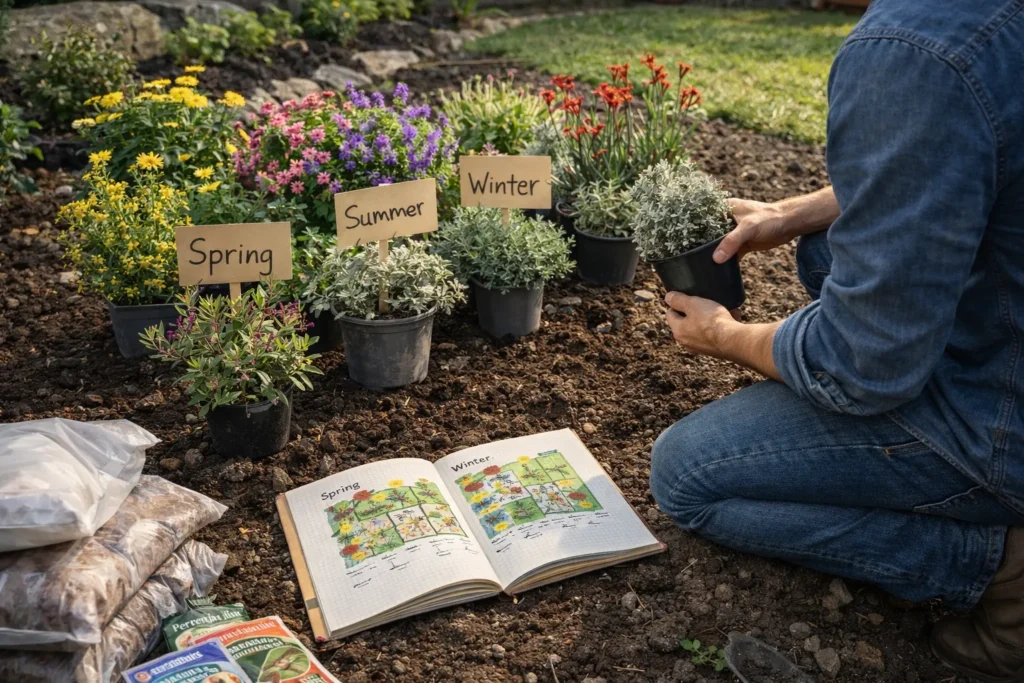
Your garden needs plants that match your conditions without constant watering, feeding, or replacing dead ones every season. That’s why choosing the right species from the start saves you time and money down the track.
But first, you’ll need to assess which plants suit which spots in your outdoor space. Walk your garden at different times to see which areas get full sun, stay shady, or cop wind all day. This tells you what’ll actually grow where, from sun-loving vegetables to shade-tolerant ferns.
Once you know your garden’s conditions, focus on native plants. They work best for Australian gardens because they’re already adapted to our conditions and soil types. Kangaroo paw and coastal rosemary, for instance, grow well once established without much fuss.
You can use the Australian Native Plants Society’s database to check which natives suit your region.
It’s also important to choose plants that look good in various seasons, so your garden stays interesting year-round. For example, spring bulbs give you early colour, while summer perennials keep beds full during warm months. Evergreen shrubs provide structure through winter when other plants die back, stopping your garden from looking bare half the year.
When DIY Makes Sense (and When It Doesn’t)
You can handle simple jobs like planting shrubs, spreading mulch, or laying basic garden paths by yourself on weekends. But when things get technical (think retaining walls over a metre high or electrical work for lighting), backing off and hiring licensed tradies is the right call.
That’s because jobs like big retaining walls, electrical work for garden lighting, and irrigation systems require licences, engineering knowledge, and safety standards you can’t skip. Without the right expertise, mistakes can create fire risks later on.
Being honest about your skills upfront also saves you from botched work that costs double to fix later. We’ve seen DIY retaining walls fail within a year because the drainage wasn’t done right. So, know your limits and factor professional help into your budget for must-haves that need expert work.
Realistic Timeframes for Your Garden Renovation
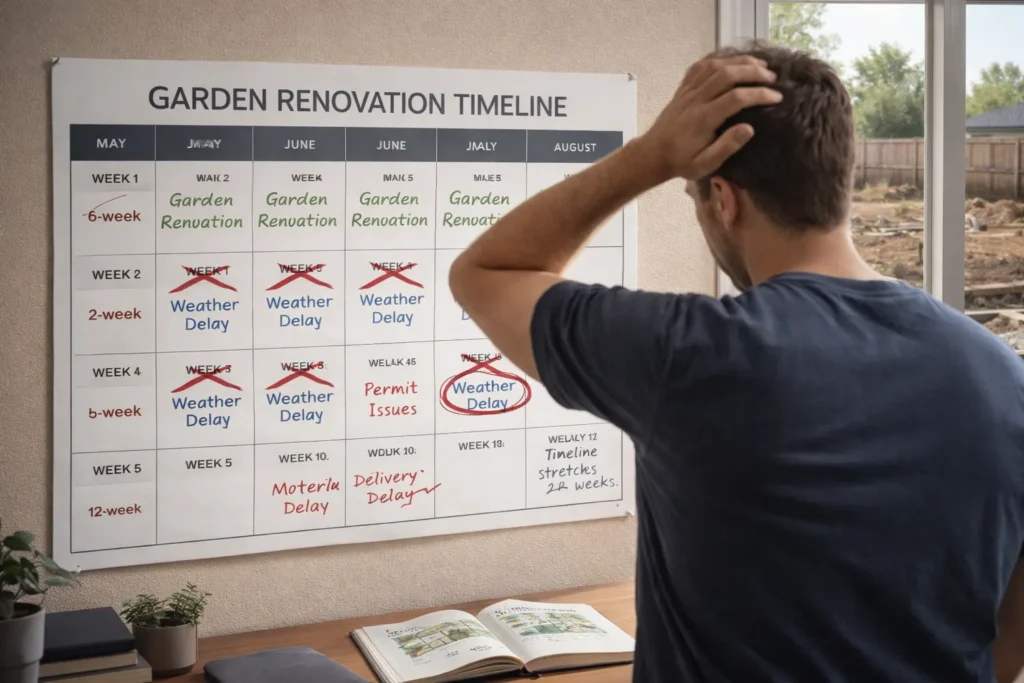
Garden renovations don’t happen overnight, even when you’re keen to see results. Most projects stretch across weeks or months, depending on the weather, council delays, and how much you’re tackling yourself.
Here’s what realistic timeframes look like:
- Planning and Approvals: This phase usually takes 2 to 4 weeks, depending on how complicated your design is and your council’s current workload. Simple projects with no structures might skip approvals entirely, while pergolas or retaining walls need proper paperwork before you can start digging.
- Physical Work: The actual construction (clearing out, building hardscape, planting) typically spans 4 to 8 weeks for average suburban backyards if you’re doing some of the work yourself. Full professional crews can cut this down to 2 to 4 weeks if the budget allows.
- Weather and Delays: You can plan for sunny weekends all you like, but one solid downpour can halt everything when you’re halfway through pouring concrete or laying pavers. Add in material deliveries running late, and suddenly your available Saturday disappears waiting for supplies. These interruptions easily stretch your timeline by another 2 to 4 weeks, so build in buffer room from the start.
The main thing is setting realistic expectations upfront rather than getting frustrated when your 6-week project stretches into 12.
Ready to Start Your Garden Renovation the Right Way?
A garden renovation follows a clear process when you break it down step by step. Start with planning and approvals, clear the site properly, build your hardscape framework, then choose plants suited to your conditions.
The whole process takes patience, but rushing ahead causes expensive mistakes. Each stage builds on the previous one, so skipping steps or doing things out of order creates problems you’ll pay to fix later.
If you need help with soil preparation, garden mix, or mulch for your new garden, Peninsula Compost supplies the Mornington Peninsula with quality materials. Get in touch to discuss your renovation and see what would work best for your space.