Category Archives: Gardening

The Garden Looks Flat on Paper: Why Level Changes Can Rewrite a Landscape Plan

The Garden Looks Flat on Paper: Why Level Changes Can Rewrite a Landscape Plan

Level changes rewrite a garden plan because a sloping garden creates zones, views, and drainage lines that a flat drawing hides. What reads as one open rectangle on paper behaves like three separate rooms the moment you walk it.

That gap between the drawing and the ground is where most budgets come undone. At Peninsula Compost, we see plans that ignore the fall, then need extra soil, drains, and walls to patch the problem later.

Good sloping garden ideas start with the fall, not the wish list. Levels change where water sits, where sun lands and where you can safely stand.

This guide covers how to set your levels, hold the soil, move water, and spend well on a slope. We’ll start with the measurements.

Terraced Gardens Start With Garden Levels You Can Measure

Gardener holding a spirit level and string line

Most sloping garden plans fail because the garden levels get drawn before anyone measures the actual fall. A string line, a spirit level and an afternoon tell you whether you have a gentle slope or a pitch steep enough to need an engineer.

Those readings decide how your terraces get built. Mark the fall at the top, middle, and base of the sloped yard, then write the numbers straight onto the plan.

How Retaining Walls Hold a Height Difference in Place

Retaining walls hold a height difference in place by pushing back against soil that wants to slide downhill, which is why height limits exist. For example, in Victoria, a wall over one metre in height needs a building permit, a threshold set by the Victorian Building Authority.

Because of this, drainage sits behind the wall as well as in front of it. We always specify ag pipe and gravel backfill, since trapped water cracks far more walls than soil weight ever does.

Retaining is the hard landscaping every later decision leans on. A properly built base lets one good wall replace three flimsy ones (your back will thank you in year five).

Garden Steps and Garden Paths That Link Each Terrace

Steps link each terrace, and their rise and tread decide whether anyone bothers using the upper garden. Around 150 mm of rise with a 350 mm tread reads as a stroll rather than a climb.

Wider treads also let you push a full barrow up without stopping halfway, which helps on delivery day. Garden paths follow the same logic, so they should run across the garden slopes instead of straight down them.

Stone steps or timber sleepers both do the job, and matching them to your walls gives you one clean line.

Timber, Brick, Stone or Gabion Walls?

Timber, brick and stone each buy you something different, so the choice follows your budget and how long the wall needs to last. Treated pine sleepers cost the least and hold for roughly 15 years.

Brick and block last closer to 50 years, while natural stone costs the most upfront and drains itself through the joints. Gabion walls, which are wire cages packed with rock, land in the middle on price and drain freely by design.

Many owners use sleepers along the back boundary and save stone for the entry. This can cut the spend significantly and still look good from the footpath.

Planting Sloped Gardens So the Soil Stays Put

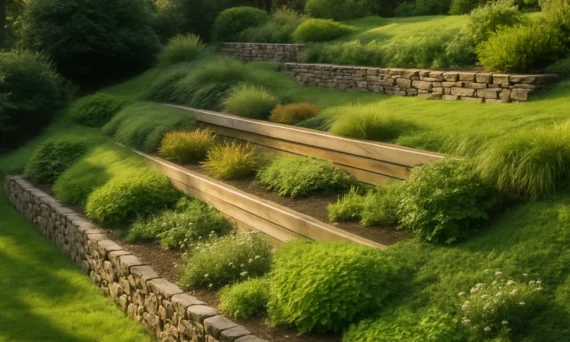
Steeply sloped garden densely planted with creeping groundcover

Planting well on sloped gardens cuts erosion, holds moisture, and saves you mowing a dangerous bank. Roots bind the top 300 mm into a mat that rain runs over rather than through, so plant selection does structural work here.

Three moves count before you order a single plant. Steep gardens reward planting density more than any clever species list.

Choosing Groundcover Plants That Grip the Bank

Groundcover plants grip a bank when their roots spread sideways, and their foliage closes over bare earth within two seasons. Vinca, creeping boobialla and prostrate grevillea all knit together fast on a dry aspect.

Beyond that, native grasses like lomandra send roots down 600 mm and hold a batter that mulch alone would lose. Four plants per square metre through jute matting carries a hillside garden through its first winter.

Honestly, lawn has no place on anything steeper than one in four, because mowing a bank is genuinely unsafe (ask anyone who has slipped with a catcher on).

Raised Beds and Rock Gardens for Awkward Corners

Raised beds give you flat, workable ground in the leftover corners without a full excavation. A 600 mm bed cut into the high side and built up on the low side creates level growing space for herbs and vegetables.

Rock gardens suit the pockets too tight for beds, where stone holds warmth and sedums cope with the sharp drainage. Gaps between the rocks stay cooler and damper than the surface suggests.

Our compost mixes suit both jobs. Beds on a slope drain quickly and need plenty of humus to hold water.

Why Does Erosion Strip a Steep Hillside So Fast?

Soil erosion strips a steep hillside fast because raindrops hit exposed ground with enough force to knock particles loose, and gravity carries them off. One storm can even shift the top 20 mm of an unplanted batter.

Water also gathers speed over every metre of fall, so a 10 metre run moves far more soil than a 3 metre one. That’s the mechanism behind the rills you see cutting across bare earth after heavy rain.

Bottom line: Mulch to 75 mm and planting straight away breaks both stages of that process in a single weekend.

How Do You Manage Water on a Sloping Backyard?
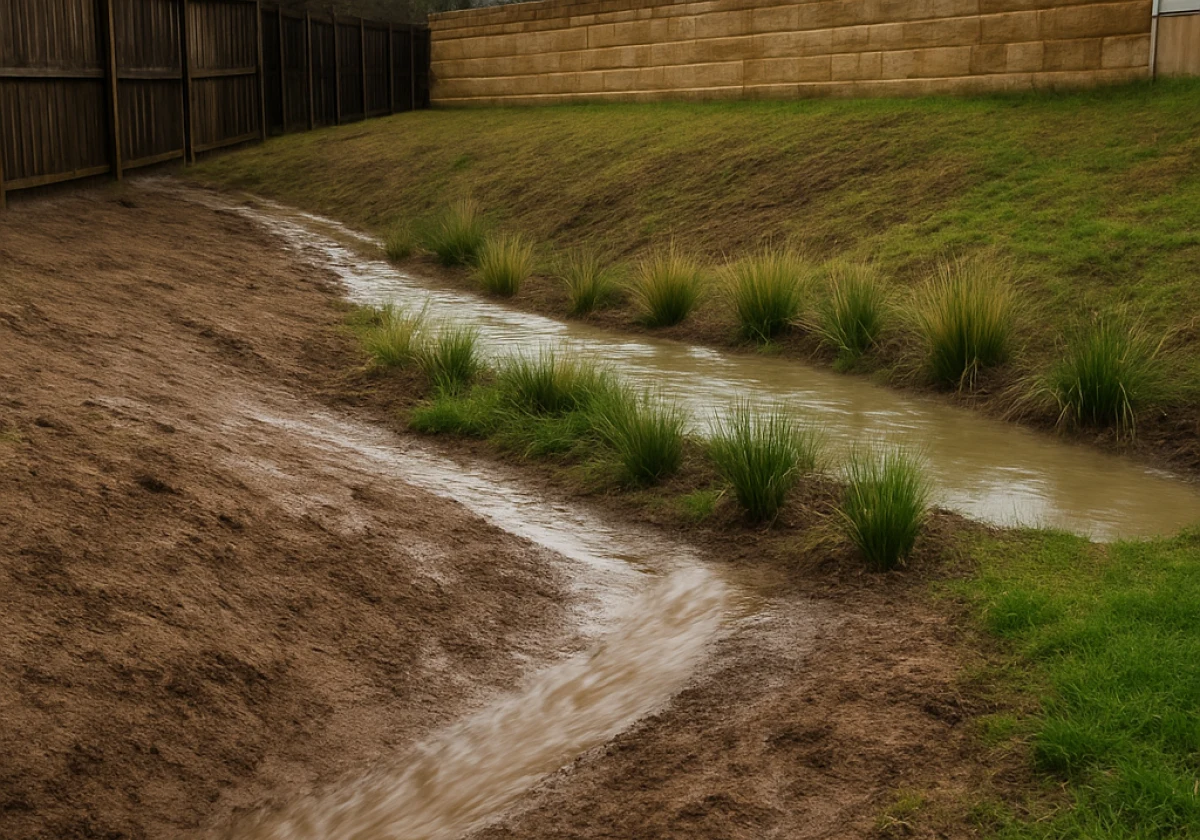
Sloped backyard after rain with water running down the slope

You manage water on a sloping backyard by slowing runoff with terraces, drains, and planting before it reaches the house. Every design choice either holds water in place or hurries it along, and there is no neutral option on a slope.

Work from the top down, because anything built below fails if the flow above it stays untouched. A shallow swale (a wide channel that redirects runoff) cut across the contour and planted with grasses catches the first surge and lets it soak in. A gravel-filled trench does the same job with less charm.

Below that, a spoon drain (a shallow curved concrete drain) at each wall base directs overflow sideways into a rain garden or tank, keeping water away from the block. We’ve seen a single 90 mm ag line fix damp that two pumps couldn’t shift.

Cascading water features suit a sloped backyard, since the fall gives a pond movement for free. Just make sure the overflow ties into your drainage system and not the neighbour’s fence line.

Budget Backyard Landscaping Can Outperform a Full Landscape Design

Quotes for terracing a steep block often run into five figures before a single plant goes in. Staging the work gets you most of the result for a fraction of that.

The table below shows where the money goes:

ApproachRough spendWhat you get
DIY sleeper terrace$120 per metreTwo usable levels, one weekend
Compost, mulch and mass planting$600 totalErosion control across a full bank
Designer plan only$1,500Measured levels you build over years
Full landscape design package$15,000 Finished outdoor living zones, built

The middle two rows carry the most value per dollar, because soil and plants fix drainage and erosion at once. Sensible backyard landscaping spends there first, then adds built structures once a wet winter has shown where the water really goes.

Full landscape design earns its keep on complex sites, though rarely before the drainage is sorted. Plenty of sloping garden ideas cost little more than a delivery of compost and a free weekend.

Ready to Put These Sloping Garden Ideas to Work?

Your slope gives you opportunities for distinct zones, wider views and sheltered areas that are harder to create on a flat block. Any site measured first and planted early pays that effort back.

Pick one terrace this season and get soil and groundcovers into it before the rain arrives. Momentum on a sloping site beats a perfect plan that sits in a drawer.

Peninsula Compost supplies compost, soil blends and mulch for terraces, banks and raised beds across the Peninsula. Send your site details and email address to the team for a delivery quote and ground that’s ready to plant.
The Back Door Opens Straight Into the Garden: Planning the First Five Metres of Your Landscape

The Back Door Opens Straight Into the Garden: Planning the First Five Metres of Your Landscape

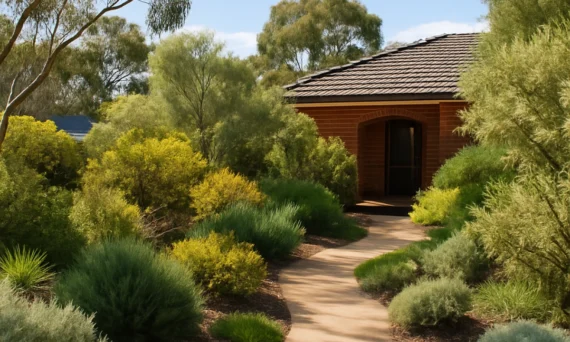
Plan the first five metres from your back door before anything else, because this zone affects the rest of your garden. You’ll cross this strip every day, so it sets the rhythm for every other part of the garden.

Most Australian homes treat it as leftover ground between the house and the lawn. That’s why so many gardens feel awkward to use, even when the plants look healthy, and the paving costs thousands. We see it on nearly every block.

This guide covers how to read your soil, plan for sun and slope, and decide between hiring help or drawing it yourself. Good landscape design across Australia starts with a tape measure rather than a trolley full of plants.

The First Five Metres Set the Tone for Your Whole Garden Layout

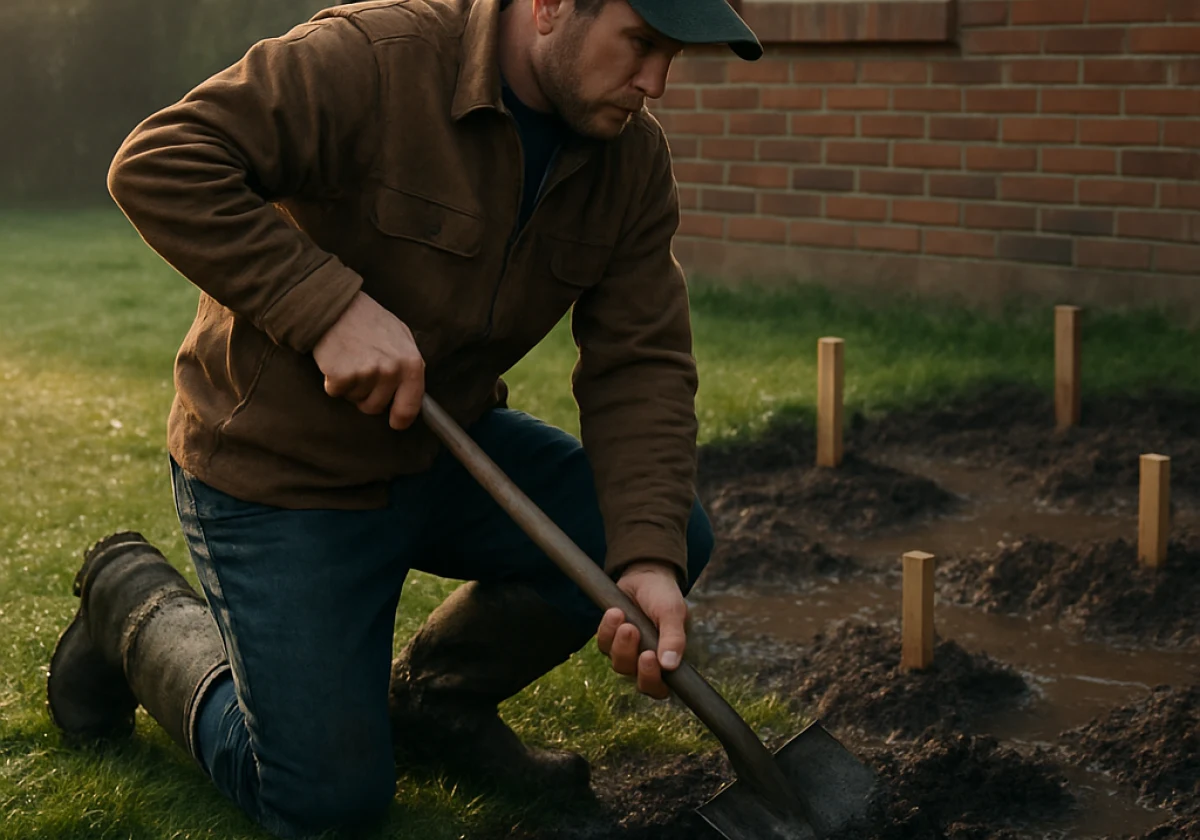
Homeowner in work clothes kneeling on wet grass near a brick house

Most Australian gardens fail in the strip closest to the house rather than at the back fence. Foot traffic, washing-line trips, and your morning coffee all cross the outdoor space nearest the door, so weak design shows up here fast.

Work through the ground, the layout principles, and your daily habits before you spend a cent on plants or paving.

Reading the Ground Before You Draw Your Planting Plans

Start by walking the zone after heavy rain, because water tells you where clay sits and where drainage already works. Mark the wet patches with pegs.

From there, dig a spade’s depth in three spots to check your soil. Sandy Sydney ground drains in minutes, while Melbourne clay holds water for days (and yes, that gap changes every plant choice).

Here is the thing: planting plans drawn before that test usually end up back at the drawing board. If the test shows compacted clay or thin sand, improving the soil with compost before planting will save you replacing plants later.

Why Borrow Ideas From Landscape Architecture and Design?

Landscape architecture and design give you tools for reading a whole site rather than a single spot for pots. The planning process considers circulation, levels, and sight lines before selecting plants for the space.

Those design principles are simple enough to copy at home for free. In our experience, homeowners who sketch movement first tend to waste less money. Award-winning studios work in the same order.

Matching Your Outdoor Living Zone to How You Live

Your garden layout should follow your habits, so list what happens here: bins out, dog let off, washing hung, kids fed. Write it down so you plan around your real routine rather than relying on memory.

Take a family of five. They need 1.5 metres of clear width past the door. Similarly, a couple with a barbecue needs a flat 3 by 3 metre pad, so measure your table before pouring concrete.

Design around your everyday week, not the dinner party you host twice a year.

How Do Backyard Pathways Guide Movement in Landscape Design Australia?

Couple walking side-by-side along a wide stone paver pathway

Backyard pathways guide movement by giving feet one clear line from the back door to each part of the garden. People will cut corners across turf and wear a bare track through it within a single season if the path doesn’t give them a clear line.

Width is the first decision. One person walks comfortably on 900 mm, two people side by side need 1200 mm, and a loaded wheelbarrow needs a clear 1000 mm run.

Beyond width, the surface decides how often you’ll use that path in July. Smooth pavers with 10 mm joints stay walkable in bare feet, while loose gravel spills into beds and tracks straight back inside your home. Honestly, a straight 6 metre run is the one line we’d never bend just for the look of it.

Landscape Planning for the Australian Climate: Sun, Slope and Sight Lines

Good landscape planning saves you from ripping out paving and plants that never suited the spot. According to the Bureau of Meteorology, Australia’s climate has warmed by about 1.5°C since 1910. That makes plants suited to the local climate a wiser investment than installing a larger sprinkler system.

Run these three checks before your design development goes any further, because landscape design Australia-wide begins with the block in front of you.

Tracking Sun and Shade Across the Seasons

Photograph the zone at 9 am, noon and 4 pm on one clear day, then repeat the same three shots six months later. Winter sun sits roughly 30 degrees lower, which drags shade lines several metres across your paving.

North-facing outdoor spaces bake from November, so plan shade there instead of lawn. South-facing courtyard gardens stay cool and suit ferns and clivias (they’ll sulk in hot afternoon sun).

Build plant palettes around species from your own region, because they handle that seasonal swing with little extra care.

Working With Slope Instead of Fighting It

Residential Australian garden courtyard on a winter afternoon

Slope costs money the moment you fight it, because retaining walls above 1 metre need council approval and engineered footings, so check your local rules.

Instead, split a gentle fall into two low terraces joined by 400 mm sleeper steps. We’ve watched that one change halve construction budgets on Central Coast landscape design projects without touching the planting budget.

What Garden Designers Check First

Garden designers check boundaries, services and sight lines first, because a sewer line under your planned pool rewrites the whole project before it starts.

After that, they stand at the kitchen sink and look out. That single view drives more decisions than anything else, which is why your best specimen tree belongs where you see it each morning.

Choosing Between Garden Designers and DIY Garden and Landscape Design

Now that you know what to map, the next call is whether to hire help or draw it yourself. The same design principles apply either way, so slope, budget and drawing confidence settle the argument faster than taste does.

Weigh these three points against your own block before you commit:

  • Site Difficulty: Steep ground, retaining above 1 metre or a pool pushes the job past weekend skills. Bring in a landscape architect once engineering enters your plans.
  • Budget Reality: Design services on residential design work typically run 5 to 10 per cent of the build cost. That fee buys planting schedules and plans a builder can price line by line.
  • Timeline Pressure: Award-winning studios in Melbourne and Sydney often queue landscape design projects three to six months ahead. Begin the simple zones yourself while you wait.

A flat, small and simple site suits a DIY approach, while slope, drainage or a pool calls for a garden designer. Either way, bring a clear sketch, because professionals work faster from your measurements.

Bottom line: you can design outdoor zones yourself and save the detail for the parts you cannot solve. Most of the time, a clear sketch is what a professional wants from you anyway.

Start Your Landscape Design Garden Plan at the Back Door

The first five metres decide whether you use your garden or only look at it through glass. Your landscape design garden plan fits on one sheet of A4 once the zones are clear, and a designer landscape look comes from restraint rather than spending.

A sustainable garden needs soil that holds water, native plants suited to their spot, and planting schedules you can keep up with.

So grab your pegs, photograph the shade and mark the path line this weekend. Small measured steps beat a full redesign you never begin.

Peninsula Compost supplies soil, mulch and compost for Australian gardens. Contact us to talk through your first five metres and get the soil right before the first plant goes in.

landscape design

Why a Landscape Plan Saves Time During Outdoor Renovations

A landscape design saves time during outdoor renovations because it lines up drawings, approvals, and trades before machinery reaches the site. Plus, measuring the block first removes a day of guesswork once the digging starts.

Unfortunately, most homeowners begin an outdoor renovation with a folder of Landscaping Ideas and no measured drawing to price against. And that gap is where budgets go out of hand. It is also why Peninsula Compost sees so many half-finished gardens sitting through a wet winter.

This guide covers what a landscaping plan includes, what skipping one costs, and how the same drawing runs the build. You will also see where rough landscape design ideas became real dimensions.

Let’s start with what landscape design planning covers.

Landscape Design Planning: What It Covers Before Work Begins

## Landscape Design Planning: What It Covers Before Work Begins

Outdoor renovations run late because nobody set the sequence, not because the weather turned. Some homeowners call it landscape architecture while others call it “Garden Design”. However, most landscape designers start the design process similarly, with an initial consultation on site.

The plan then fixes levels, drainage, and material orders weeks before an excavator books a slot. It also settles plant selections early, so you can order the stock in the right season.

The following three parts of the landscape design process have the greatest impact on keeping the project organised and on schedule.

How Much Outdoor Space Should Your Garden Design Project Cover?

You should plan across the whole block rather than just the corner you want to change. As water, drainage, and access can affect adjoining areas, the design needs to account for how the spaces connect. Usually, even a 120 square metre backyard needs a side path, a bin bay, and room to swing a wheelbarrow.

Site analysis is generally the first step in any garden design project. Our design team measures the front and rear together. Then it marks which functional outdoor spaces carry traffic and which stay planted (the mud shows you within one wet week).

Good site analysis then decides if the outdoor space design can carry swimming pools, raised decks, water features, or simply wider garden beds. Larger blocks also give you room to separate dining, lawn areas, and outdoor kitchens into distinct zones.

Landscape Construction Zones and Outdoor Areas Get Mapped Early

Once the measurements land, the drawing splits your yard into soft zones and hard zones. Each zone carries a different build order. For example, planted areas need soil depth and irrigation systems, while paving, retaining walls, and steps need a compacted base and set-out pegs.

And marking both on one drawing stops the classic clash where a paving crew arrives before the plumber has run sleeves under the path. For a water feature, mark the power supply and pipe route before paving starts.

The same plan can also show how paving affects stormwater flow. Every square metre of paving sheds water somewhere, so the design needs to show where that runoff will go during a storm.

Across fifteen years of landscape construction services, that drawing clash has caused more two-week delays than any other problem. Plus, most landscaping projects our team gets called in to fix have the same gap in the drawing.

Setting a Realistic Construction Timeline and Project Management Plan

A realistic timeline for any landscape project works backwards from the slowest item. Usually that is a council approval or a stone order rather than the digging. So the plan pins dates to each stage:

  • Demolition
  • Drainage
  • Landscape construction
  • Planting
  • Handover

This way, a buffer week sits after the wet trades finish.

Fortunately, good project management keeps those dates honest. Each design phase gets its own date as well, instead of just the build weeks.

On top of that, homeowners who see those dates on paper stop chasing the team for updates, and the team stops quoting the same job twice (calm sites finish quickly).

Skipping a Landscaping Plan or Garden Design Concept Can Cost You Later

## Skipping a Landscaping Plan or Garden Design Concept Can Cost You Later

Written plans let every trade quote against the same drawings, which cuts costly revisions. Without one shared plan, contractors may price different scopes, leaving you to cover changes and extra work later.

Four costs surface on almost every unplanned garden renovation our team inspects:

  • Double Handling Costs: Crews lift fresh turf to trench for drainage, so you pay twice for the same square metre of lawn.
  • Quote Drift: Three landscaping companies can price three different projects when the plan lacks clear dimensions, and the cheapest quote may leave out retaining walls.
  • Approval Delays: Expect four to six extra weeks when a council knocks back pool fencing or boundary heights.
  • Plant Losses: Planting windows are narrow, so a garden planted in the wrong month loses plant selections you replace at full retail price.

Bottom Line: A landscape design project costs a fraction of one rebuild, and it hands your team a single source of truth.

That said, landscaping ideas are cheap on paper and dear on site. Skipping the plan can lead to changes, rework, and extra labour costs within the first fortnight.

Moving From Design Development to Finished Outdoor Living Areas

Generally, concept design sets the overall look, while design development works out the practical details needed for construction.

Once the homeowner approves that design phase, the same document guides every stage of the landscape project. The supervisor works from the set-out sheet, so the operator knows the finished patio level before the first bucket lifts. That one reference keeps design and construction talking to each other.

From there, the build follows the order of the drawing sets: services, drainage, structures, surfaces, then planting. For this reason, heavy structures and features that need machinery should go in before paving and other finished surfaces, while access remains clear.

Meanwhile, the landscape designer checks progress at three points:

  1. After set out
  2. After hard surfaces
  3. Before planting

Honestly, that middle check saves the most money, since a paving fall fixed at 20 square metres beats fixing it at 80 (we have measured both). This way, outdoor living comes together last, once the mud has gone and the outdoor rooms read as one space.

When you receive the garden after completion, you get a marked-up copy of the garden and landscape plan showing pipe runs, cable depths, and plant names. Native plants are labelled too, so nobody prunes a young grevillea like a hedge.

Keep that plan for future maintenance, as it shows where services run and helps you find the right plants and equipment when repairs are needed.

Does a Landscape Plan Cover Garden Maintenance and Landscape Maintenance?

## Does a Landscape Plan Cover Garden Maintenance and Landscape Maintenance?

Yes, a good plan schedules landscape maintenance visits for the first year after planting. New gardens and fresh garden beds need very different care in month one than in month twelve.

Here is what that first year usually looks like.

PeriodMaintenance focusVisit frequency
Months 1 to 3Watering checks, weed control, stakingFortnightly
Months 4 to 6First prune, mulch top-up, irrigation tune-upMonthly
Months 7 to 12Feeding, hedge shaping, lawn coringEvery 6 to 8 weeks

Quick Tip: Lock that first year of garden maintenance into the same contract as the build. The early maintenance period helps new plants establish before seasonal stress exposes weak areas.

Plant selection does a lot of the work as well, since native plants and drip irrigation systems cut the ongoing maintenance a new garden needs. Shady, windy, and dry outdoor environments each need their own watering habits. Sustainable design earns its keep in year two, when the watering drops off.

Every summer our crews rescue gardens that lost plants because nobody booked those visits.

Ready to Start Your Outdoor Renovation With a Solid Garden and Landscape Plan

Good drawings are the cheapest part of any outdoor renovation, and they protect every dollar you spend after them. So getting the levels right keeps your build on schedule from day one.

Book your initial consultation before spring, when landscape designers and landscape construction services across the Mornington Peninsula fill their calendars eight weeks deep. One short site visit and a measure-up set a whole landscape design project up properly.

Peninsula Compost supplies screened soils, mulch, and compost blends for homeowners planning functional outdoor spaces at home. Contact our team to match your plans with the right blends and give new plantings a strong start.

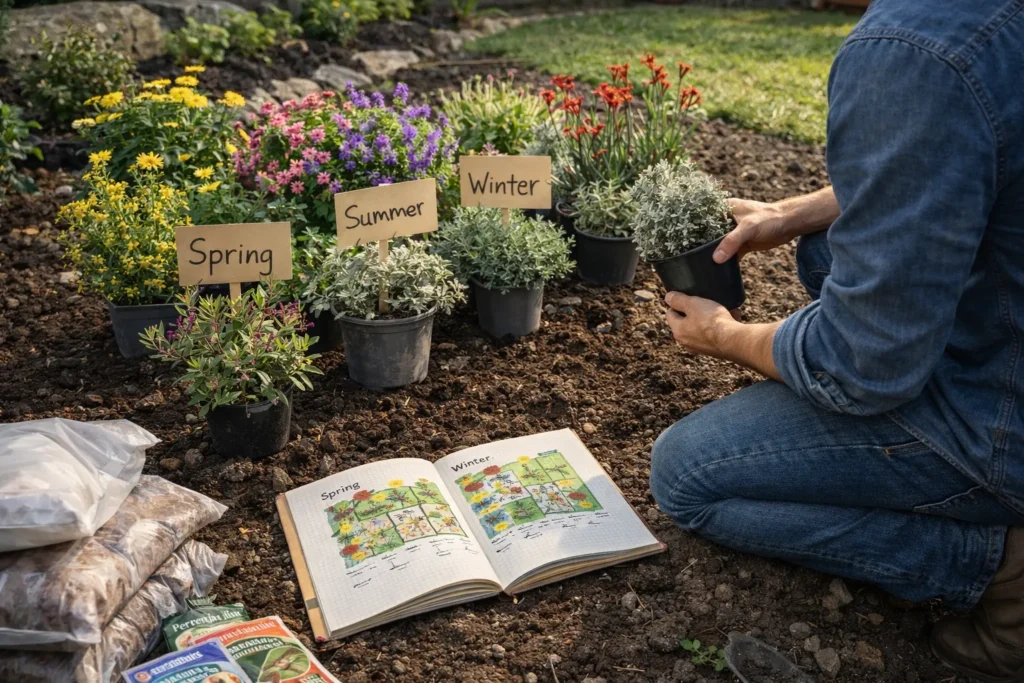
Choose Your Garden Plants for Every Season

Choosing Plants That Stay Attractive Across Every Season

You spend good money on garden plants, put in the hours, and by November the yard looks full and alive. Then February arrives, the colour fades, and the garden sits flat for months. Most people assume they need to water more or work harder. The gap is almost always in the plants you choose and how you combine them.

This is one of the most common problems we see on the Mornington Peninsula, and in most cases it’s entirely fixable. At Peninsula Compost, we’ve spent over 20 years helping homeowners here build gardens that carry colour, texture, and structure across every month. Plant selection is the starting point, and every layering and design decision builds from there.

Start by matching plants to your soil, sun, and space, and every planting choice you make will have a stronger footing. This guide covers the native plant combinations, garden design ideas, and landscape techniques that keep a yard looking full and structured in every season.

Why Most Garden Plants Perform in Spring

Walk into any garden centre in September, and it’s easy to understand why so many gardens peak early and lose their appeal fast. Every bench holds the strongest stock of the season: a beautiful range of dense foliage, rich tones, and flowers at every turn. You pick the garden plants that catch your eye, and by October the whole yard looks great.

Why Most Garden Plants Perform in Spring

The catch is that growers develop those plants for exactly that spring display. How they perform in June or July rarely enters the equation. So you end up with a garden that has nothing left to show by mid-year.

The foliage has thinned, the tones have faded, and bare soil fills the gaps. When you build a garden to grow across autumn, winter, and spring, you step outside in every month, instead of just the good ones. That shift starts with plants that serve the yard across multiple seasons.

Australian Native Plants That Earn Their Place All Year

We’ve planted natives across hundreds of Peninsula gardens, and certain plants earn their place in almost every one. They hold their colour and structure long after the flowers are gone, and most spring nursery plants have nothing left to show by mid-winter.

These natives also actively support local birds, bees, butterflies, and broader garden biodiversity. That means they contribute to the local environment in ways that most nursery products simply don’t. Believe it or not, few sustainable choices you can make for your garden deliver that kind of result for local biodiversity and the broader ecosystem.

The ANPSA database lets you search by flowering season, colour, and size to find species that suit your yard. Here are three native plant groupings that work across the Peninsula.

  • Grevilleas and Kangaroo Paw: Grevilleas and kangaroo paw complement each other in ways that keep a Peninsula garden active for most of the year. Grevilleas carry the cooler months with nectar-rich blooms that bring honeyeaters and other native birds into the garden through winter. Kangaroo paw picks up through spring and early summer with tall flower spikes in yellows, pinks, and reds.
  • Lomandra and Native Grasses: Walk through a Peninsula garden in the middle of winter and lomandra is almost always what keeps the space looking structured. It holds deep green foliage all year, handles dry conditions well, and suits most soil types across the Peninsula. Native grasses like Poa labillardieri add movement and texture alongside it, and the yard holds its visual interest right through winter.
  • Native Violet and Myoporum: Bare soil at ground level is one of the most common gaps in a layered garden, and these two plants address it directly. Both spread quickly, add privacy between shrubs, and suppress weeds without any additional products. That means less time on upkeep and a garden that looks finished from every angle, even through winter.

When you use all three groups together, your garden has flowering tones, structural foliage, and ground cover in every season. How you arrange those layers is what separates a good garden from a flat one.

How Layering Makes Any Garden Look Fuller

Most gardens we see nail the middle layer: a few shrubs in flower, but nothing above them and nothing at ground level. Layering gives every part of the landscape design a clear purpose. These three layers make up a balanced garden, and each one does different work.

Canopy Layer: Trees That Anchor the Space

Canopy Layer: Trees That Anchor the Space

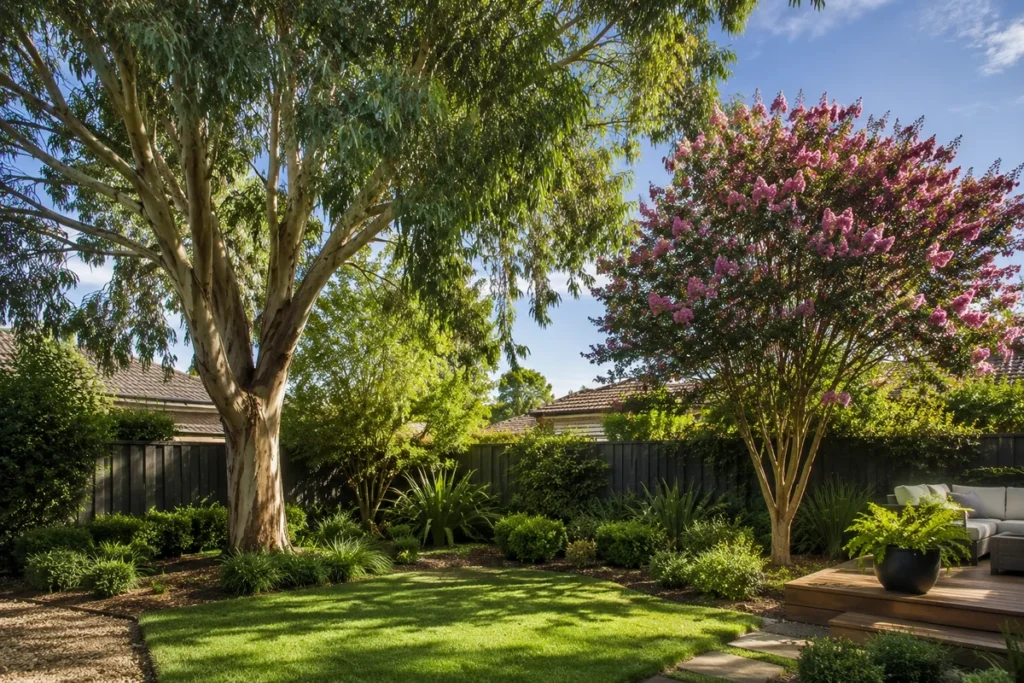
Canopy plants and trees give the garden its height and create a strong landscape framework that ties the areas below into one connected space. For example, a native lemon-scented gum or a crepe myrtle creates shade, adds year-round presence, and stops the yard from feeling low and exposed.

The canopy also influences how your soil drains and holds moisture, so the plants below stay healthier through dry spells.

Mid-Level Layer: Shrubs That Carry the Colour

Flowering shrubs fill the space between canopy and ground with seasonal tones, and they draw birds and pollinators into the garden too. This is the layer most people get right instinctively, and for good reason. When it works well, the mid-level layer gives the garden its main identity through spring and summer.

Pro Tip: Search for plants and products that offer extended flowering periods. Mix early, mid-, and late-season bloomers to keep colour moving through the garden for longer.

Ground Layer: Cover That Holds the Base

The ground layer is what gives a layered garden its finished look from every angle. A strong canopy and mid-level layer can still leave the base looking raw and exposed if nothing covers the ground beneath them. Low-growing plants here tie planting beds to surrounding turf and pathways, and the whole outdoor space reads as one connected design.

Honestly, when all three layers are working, the yard holds together rather than feeling like a collection of separate plants. The garden earns its place as somewhere you genuinely love to be.

How Landscape Design Keeps Colour Going All Year

How Landscape Design Keeps Colour Going All Year

If flowers are the only thing carrying your garden through the year, July is going to feel like a long month. Most garden owners overlook foliage, bark, and plant form between flowering periods (bare soil and dead stems aren’t exactly a design feature). Thoughtful landscape design uses all three intentionally, and that keeps a garden full and structured through the cooler months.

The gardens around Mornington that still look good in July almost always share one thing: someone paid close attention to foliage. Silver-grey native grasses against dark-barked eucalypts hold their own through winter without a single flower in sight. The ANPSA resource on local microclimates is worth reading before you finalise a planting plan. Local conditions determine which foliage combinations hold their colour reliably.

When you mix deciduous and evergreen plants and explore a range of landscape combinations, the garden develops its own style. It reads as a cohesive design that lets each plant do what it does best. Water features, garden beds, and carefully chosen landscape products all sign off on that consistency. That’s the result when plant selection, design, and layering all connect.

Build a Garden Design That Holds Its Appeal All Year

The right plant choices and a layered layout will keep your yard looking full and considered every month. When you treat foliage and form with the same attention as flowers, the whole garden holds together, even in the middle of winter.

When you plan a garden this way, it feels different from one that grew by accident. Every layer has a reason to be there, and the plants support each other across the seasons rather than pulling in different directions. That consistency gives you a garden you genuinely look forward to spending time in.

At Peninsula Compost, we’ve spent two decades helping local homeowners build gardens that perform and look considered in every season. Get in touch with our team, and we’ll put together a plan around your property, climate, and lifestyle.

garden renovation process

From Empty Yard to Functional Garden: What the Process Looks Like

An empty yard holds untapped potential, but turning it into a functional garden takes more than enthusiasm and a weekend. You also need to know what happens between bare ground and the finished garden to unlock that potential.

The garden renovation process follows the same sequence every time: planning, council approvals, site preparation, framework installation, and planting. Miss a step or jump ahead too early, and you’ll spend money redoing work or waiting for permits while plants sit in their pots.

This guide covers the garden renovation process from start to finish. You’ll learn what each stage involves, how long it takes, and what happens if you rush ahead before you’re ready.

Let’s get into it.

Planning Your Dream Garden: Where Every Renovation Starts

Planning Your Dream Garden: Where Every Renovation Starts

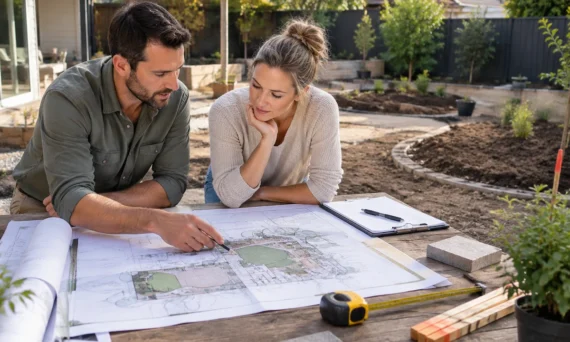
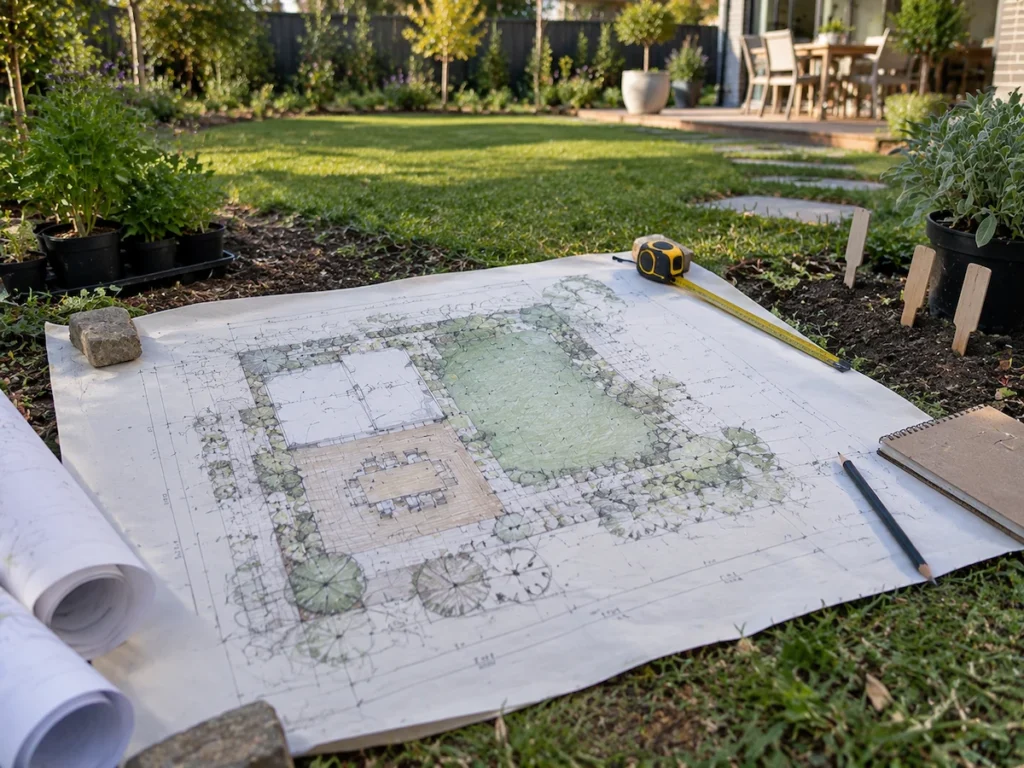
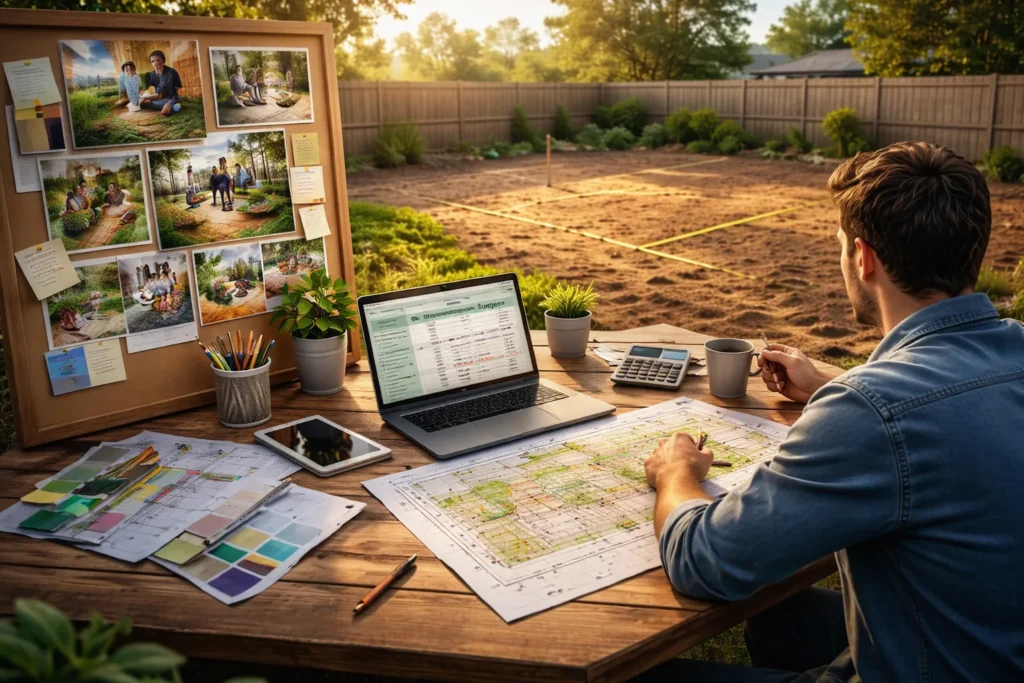
A garden renovation process starts with measuring your outdoor space, setting a realistic budget, and sketching a design that fits your family’s needs. And proper planning prevents expensive mistakes before you buy a single plant or paver.

Start by taking accurate measurements. Grab a tape measure and note your yard’s dimensions, including existing structures like sheds or fences. Sketch this to scale on graph paper or use a simple drawing app.

Next, set a realistic budget. You don’t want to fall in love with a bluestone retaining wall design only to realise timber sleepers are all you can afford. The cost of your garden renovation can vary depending on the materials and features you choose. A simple lawn and garden beds won’t stretch your budget like adding patios and outdoor lighting.

Finally, list what your family actually needs from this space. Think about who’ll use the garden and how. Kids need play areas, cooks want herb gardens, and entertainers need outdoor dining spots.

Writing down your needs keeps you focused on must-haves instead of buying random features that look good but don’t fit how you live.

Sorting Approvals and Deciding What’s Worth Keeping

Imagine building that dream pergola over three weekends, then getting a council notice saying you need to tear it down. Sounds far-fetched, but it happens a lot. That’s why checking what needs approval should be your first move.

Most councils need permits for pergolas, retaining walls over 1 m high, and structures built near your fence line. The rules vary depending on your location and what you’re building. To check what applies to your project, visit your local council website.

Some projects also need engineering certificates or detailed plans before the council gives the green light, especially for retaining walls or major excavation work.

While you’re sorting paperwork, decide what’s worth keeping from your current yard. For instance, mature trees that took decades to grow aren’t worth removing unless they’re diseased or dangerous. Old brick edging or quality paving materials, on the other hand, can be reused in your new garden design to save money.

The Big Clear-Out: Removing Old and Prepping Soil

The Big Clear-Out: Removing Old and Prepping Soil

You spring clean your house once or twice a year, right? Your small backyard needs the same treatment before a new garden goes in. Otherwise, your new plants might end up fighting compacted soil and dodgy drainage the whole time.

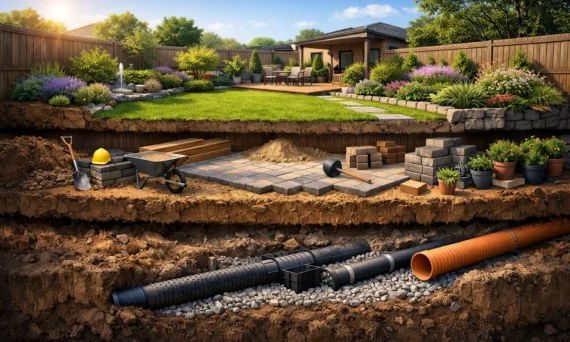
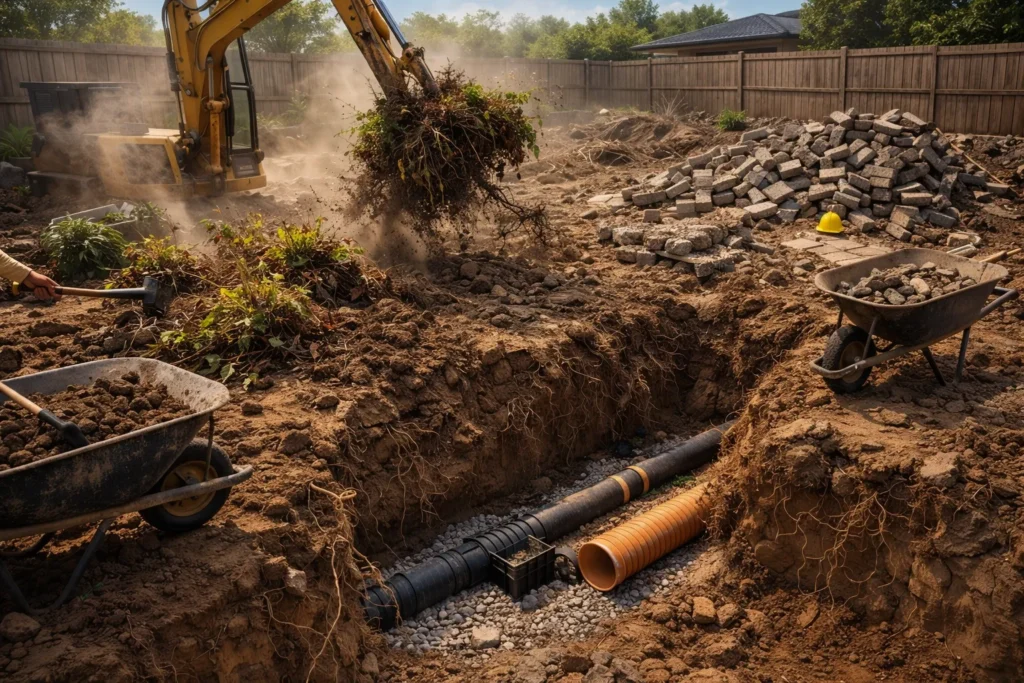
First off, rip out old plants and paving, then dig down about 50 cm. This gives you fresh ground to work with rather than soil that’s been compacted for years. You’ll also expose leftover roots from old trees or shrubs that need removing, since buried roots can strangle new plants as they grow.

Digging this deep lets you fix drainage while the ground is exposed. Without it, water can pool and cause root rot, killing plants faster than pests or diseases. Even drought-tolerant species struggle if water doesn’t drain properly, so install drainage pipes or shape gentle slopes to guide runoff before refilling with soil.

After drainage is sorted, replace what you’ve removed with a quality garden mix. Fresh soil gives plants the nutrients they need to establish quickly without fighting depleted ground. This is especially important for raised beds and vegetable gardens, where soil conditions directly affect growth.

Hard Landscaping: Building Your Garden’s Framework First

Have you ever watched a landscaping crew and wondered why they spend weeks on paths and walls before a single plant goes in the ground? Hard landscaping creates the bones that hold everything together.

Skip this step, and your garden ends up looking like random plants scattered around, with nowhere to actually walk or sit. That’s why most renovations put these core structures in place before any planting begins:

  • Paths and Edging: When mates come over for a barbecue, they need somewhere to walk without trampling through your garden beds. Laying paths first gives you access routes for wheelbarrows and equipment during the rest of the build. As for edging, it keeps your lawn from creeping into garden beds over time, which means less constant trimming.
  • Retaining Walls and Raised Beds: Tackle these next if your yard slopes or water pools in spots after rain. They create level areas for planting and stop soil from washing away during storms. Raised beds are also kinder on your back and let you start with fresh soil rather than whatever rubbish is already there.
  • Structural Materials: Your choice here (timber sleepers, brick, or bluestone) sets the visual tone for your entire outdoor space. These materials hold everything together through every season, even when plants die back in winter.

Getting this done before planting saves you from trampling new garden beds while mixing concrete or dropping heavy pavers around.

Choosing Plants That’ll Thrive Year-Round

Choosing Plants That'll Thrive Year-Round

Your garden needs plants that match your conditions without constant watering, feeding, or replacing dead ones every season. That’s why choosing the right species from the start saves you time and money down the track.

But first, you’ll need to assess which plants suit which spots in your outdoor space. Walk your garden at different times to see which areas get full sun, stay shady, or cop wind all day. This tells you what’ll actually grow where, from sun-loving vegetables to shade-tolerant ferns.

Once you know your garden’s conditions, focus on native plants. They work best for Australian gardens because they’re already adapted to our conditions and soil types. Kangaroo paw and coastal rosemary, for instance, grow well once established without much fuss.

You can use the Australian Native Plants Society’s database to check which natives suit your region.

It’s also important to choose plants that look good in various seasons, so your garden stays interesting year-round. For example, spring bulbs give you early colour, while summer perennials keep beds full during warm months. Evergreen shrubs provide structure through winter when other plants die back, stopping your garden from looking bare half the year.

When DIY Makes Sense (and When It Doesn’t)

You can handle simple jobs like planting shrubs, spreading mulch, or laying basic garden paths by yourself on weekends. But when things get technical (think retaining walls over a metre high or electrical work for lighting), backing off and hiring licensed tradies is the right call.

That’s because jobs like big retaining walls, electrical work for garden lighting, and irrigation systems require licences, engineering knowledge, and safety standards you can’t skip. Without the right expertise, mistakes can create fire risks later on.

Being honest about your skills upfront also saves you from botched work that costs double to fix later. We’ve seen DIY retaining walls fail within a year because the drainage wasn’t done right. So, know your limits and factor professional help into your budget for must-haves that need expert work.

Realistic Timeframes for Your Garden Renovation

Realistic Timeframes for Your Garden Renovation

Garden renovations don’t happen overnight, even when you’re keen to see results. Most projects stretch across weeks or months, depending on the weather, council delays, and how much you’re tackling yourself.

Here’s what realistic timeframes look like:

  • Planning and Approvals: This phase usually takes 2 to 4 weeks, depending on how complicated your design is and your council’s current workload. Simple projects with no structures might skip approvals entirely, while pergolas or retaining walls need proper paperwork before you can start digging.
  • Physical Work: The actual construction (clearing out, building hardscape, planting) typically spans 4 to 8 weeks for average suburban backyards if you’re doing some of the work yourself. Full professional crews can cut this down to 2 to 4 weeks if the budget allows.
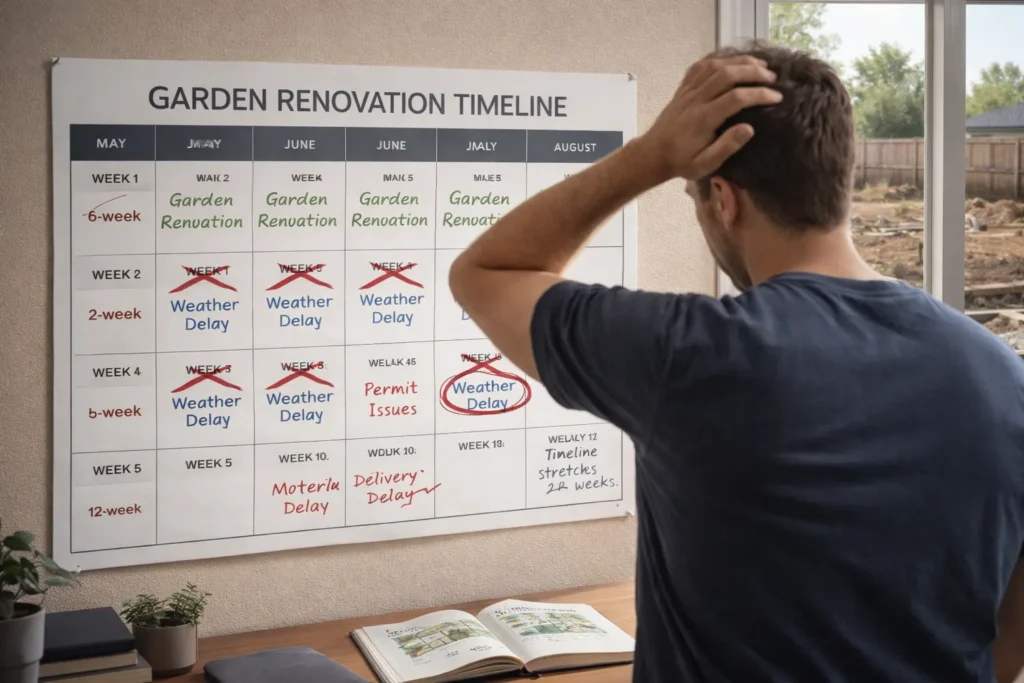
  • Weather and Delays: You can plan for sunny weekends all you like, but one solid downpour can halt everything when you’re halfway through pouring concrete or laying pavers. Add in material deliveries running late, and suddenly your available Saturday disappears waiting for supplies. These interruptions easily stretch your timeline by another 2 to 4 weeks, so build in buffer room from the start.

The main thing is setting realistic expectations upfront rather than getting frustrated when your 6-week project stretches into 12.

Ready to Start Your Garden Renovation the Right Way?

A garden renovation follows a clear process when you break it down step by step. Start with planning and approvals, clear the site properly, build your hardscape framework, then choose plants suited to your conditions.

The whole process takes patience, but rushing ahead causes expensive mistakes. Each stage builds on the previous one, so skipping steps or doing things out of order creates problems you’ll pay to fix later.

If you need help with soil preparation, garden mix, or mulch for your new garden, Peninsula Compost supplies the Mornington Peninsula with quality materials. Get in touch to discuss your renovation and see what would work best for your space.

Small Outdoor Corners That Can Become Great Hangout Spots

Small Outdoor Corners That Can Become Great Hangout Spots

Do you have a small corner in your yard that sits empty and forgotten?

You can actually make that space into a cosy outdoor room without a major remodel.

All you need is the right furniture, a few plants, and some simple planning. And the best part? You don’t have to spend a lot of money.

In this post, we’ll walk you through budget-friendly backyard ideas and practical tips so you can create a perfect spot for relaxing with family or enjoying your weekends.

We’ll start with a few layout ideas to help you plan your space.

Small Backyard Layout Tips to Create a Comfortable Outdoor Room

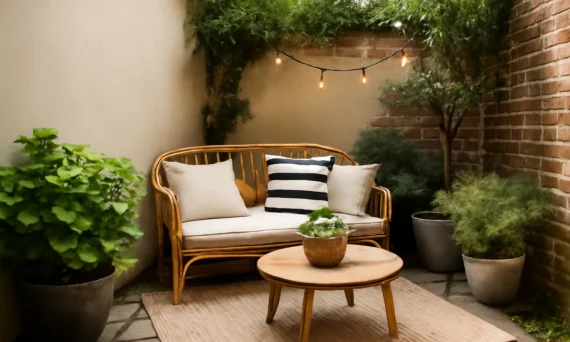
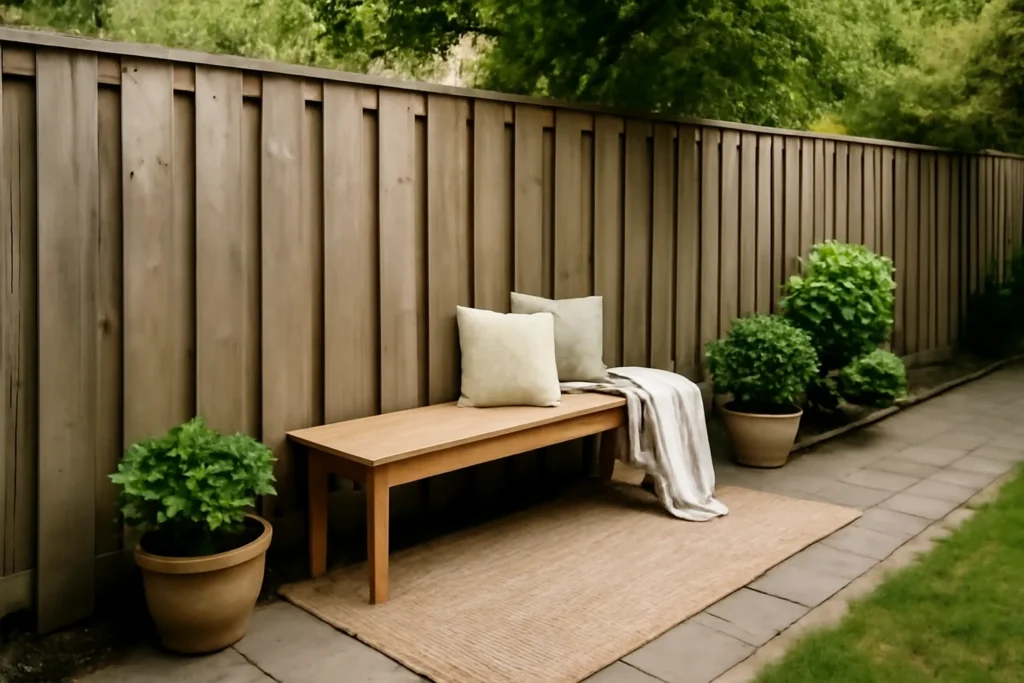
Your small backyard can still be vibrant and inviting. That narrow strip along your fence can become a cosy seating nook with a bench and a few potted plants. But you need to plan things first. Here are some practical tips to help you get started.

Small Backyard Layout Tips to Create a Comfortable Outdoor Room

Measure and Plan

Before you spend any money, take a few minutes to measure your space and write down what you’re working with. Once you have the numbers, walk around at different times of the day to see where the sun and shade fall, and take note of things like fences, walls, or trees.

After gathering all of this data, you can try sketching things out on graph paper or using a free tool like Garden Planner.

We often notice that this step alone helps people avoid buying furniture or plants that end up being the wrong size or in the wrong spot.

Make the Most of Odd Spaces

Got a weird corner or an oddly shaped patch of grass? That’s actually a good thing. These spots are perfect for creating separate “zones” in your backyard.

For example, you could add a small wooden platform for a seating area and tuck a corner bench against a fence. Then fill those empty spots with gravel and some potted plants. Don’t hold back from having fun and being creative!

Clever Space-Saving Solutions

When you don’t have much floor space, the best thing to do is think vertically. Wall planters, hanging pots, and tall garden beds will let you grow plants without using up ground room. You can also get fold-out tables and storage benches to keep your space functional and tidy.

For more budget-friendly options, you can take a quick weekend trip to Bunnings and find things like reclaimed wood, pavers, and edging materials like metal garden strips to complete your project.

Low-Maintenance Backyard Makeover with Plants and Texture

If you pick the right plants and add a mix of natural textures like wood and stone, you can create a space that looks great all year round without much effort. Let’s go through some easy ways to make this happen.

Low-Maintenance Backyard Makeover with Plants and Texture

Choose Plants That Support Your Space

The easiest way to spend less time on garden work is to pick plants that mostly look after themselves.

Hardy shrubs, like lavender, rosemary, and native grevillea, are a great starting point because they can survive Mornington Peninsula’s dry summers and cold winters with little care.

For any overgrowths that bother you, ground covers like creeping thyme or clover are a good option. They will spread slowly and stop weeds from taking over your garden beds.

Now, if your yard is already on the smaller side, we can’t recommend container gardening enough. In summer, you can easily move the containers into shaded areas to protect them from the harsh sun. Then, when winter rolls around, you can move them closer to the house where they’ll stay a bit warmer.

Our team loves this approach for keeping plants healthy while keeping your routine simple.

Add Texture With Natural Elements

Once your plants are in place, you can start adding layers of texture to finish the look. Gravel paths, timber edging, and natural stone will give your backyard that relaxed, earthy vibe. You can also use repurposed wood from old pallets or fences for extra character on a tight budget.

For your seating area, we recommend soft touches like outdoor cushions, pillows, and outdoor blankets. Pair these with low chairs or a bench, and you’ll have a cosy spot where you can sit and relax after a long day.

Avoid These Common Pitfalls

Avoid These Common Pitfalls

Even with the best intentions, a few simple mistakes can undo your hard work.

One of the most common mistakes we see is overcrowding your plants. When shrubs and flowers sit too close together, they will start competing for water and sunlight, and grow unevenly. So, space your plants properly to keep them healthy.

Another problem is choosing furniture that’s too big or that can’t handle the weather. But you should be fine if you follow our tips and plan ahead. Also, make sure paths are level, secure, and have good traction. Slippery pavers, uneven rocks, or wobbly stepping stones will cause accidents, especially in winter when paths get wet.

Create a Budget-Friendly Outdoor Space You’ll Actually Use

So, have any of these ideas sparked some inspiration for your own backyard?

Remember, the important part is having a space that feels like yours, where you can enjoy a cuppa or spend time with family.

You can start by setting aside one weekend with a simple goal. Clear out that forgotten corner, figure out how you want to use it, then add just one thing. It could be a bench, a few plants, or even a small gravel path. That small step is enough to get things moving.

If you need more inspiration along the way, have a look at Pinterest or Bunnings. Just be sure to pick what actually suits your space rather than what’s trending online.

You never know, this small backyard makeover could bring surprising joy to your everyday life and help you fall in love with your home all over again.

Ready to get started? Visit Peninsula Compost for quality soils and mulches that’ll support your new garden.

low maintenance garden

The Low-Maintenance Garden Plan You’ll Actually Stick With

A low-maintenance garden shouldn’t feel like a second job. You want an outdoor space that looks great without wasting every weekend with weeding and watering.

Here’s the scary thing: most gardens fail because of a few mistakes that are made even before you plant anything. You plan to grow drought-tolerant plants in wet spots, skip the mulch, and keep a massive lawn that demands mowing every week. Always be careful of these wrong choices.

What if a few simple setup tasks could cut your garden maintenance in half? (Excited, right?)

In this guide, we will tell you about the native plants that grow without difficulty. Then, ground covers that remove weeds, and irrigation systems that do the rest of the work for you.

So, let’s see the idea behind building a garden you’ll actually love.

What makes a garden truly low maintenance?

A low-maintenance garden should only take an hour or two each week to keep the garden looking good.

That specific hour makes gardens that genuinely work. When your plants adapt to your climate and soil, you don’t even have to maintain this time duration then.

For a low-maintenance garden, the placement of your plants is more important. If you stick a lavender plant in moist soil, then you will struggle weekly to take care of it. Now, put that same plant in dry, sandy ground. And see how it handles drought and pests, while you literally do the bare minimum.

The fact is: right plants in the right spots mean strong roots, natural disease resistance, and manageable growth. It saves both the plants and your time, too.

Common mistakes that create more work

Common mistakes is gardening

Ever wonder why your “easy” garden still eats up every weekend?

Remember that cute little shrub that you planted near the path? Within three years, it will block the whole walkway. Then, you’re out there monthly, constantly trying to maintain it. (Hope you understood now what’s eating your weekend.)

The same thing happens when you place the shrubs near retaining walls. They looked tiny at first, so you stuck them close. One day, they grew massive, and you can’t even walk past without getting scratched.

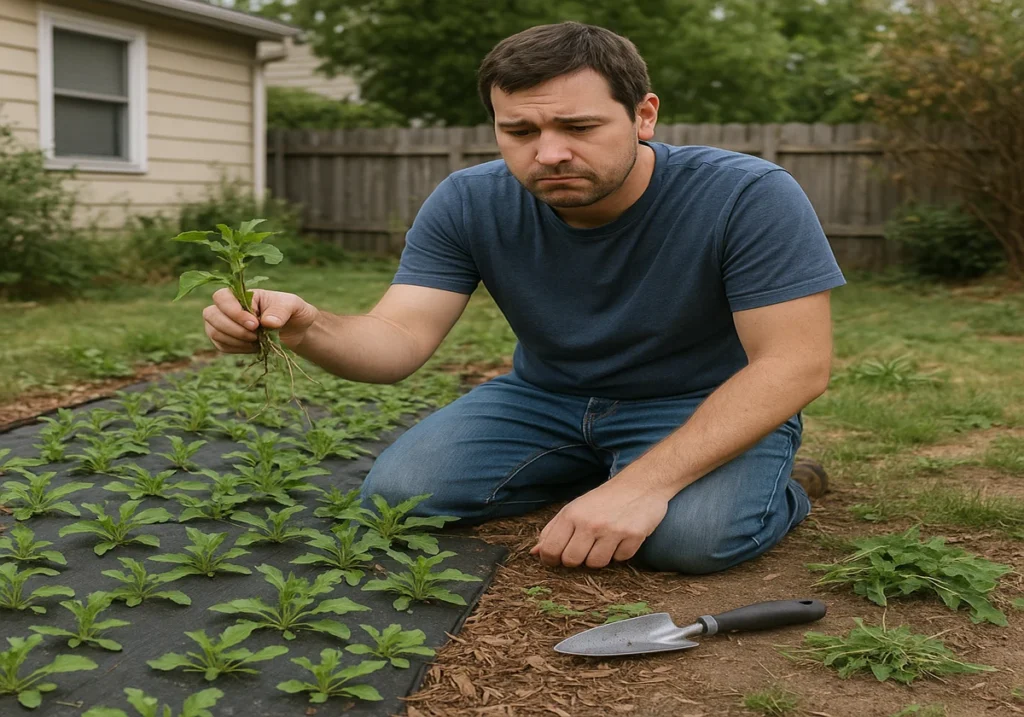
Landscape fabric seems like a genius idea when you’re at the shop. The packaging promises it’ll stop weeds. (Don’t be a fool easily.)

Suddenly, six months later, you see the weeds sprout right on top of it. They root into the thin mulch layer above the fabric. In this situation, pulling them means fighting that annoying plastic layer. (Congratulations! You’ve actually doubled your work instead of cutting it in half.)

How to design a dream garden that needs less work

Dream garden that needs less work

Planning is better than fixing mistakes every single time. Get your garden design right from the start, and you’ll cut maintenance time in half.

Most people rush to the nursery and buy plants without thinking. Then they wonder why their garden demands constant attention. However, a bit of planning changes everything.

Pick plants suited to your conditions

Matching plants to your actual conditions means they’ll grow automatically in all seasons.

Walk around your outdoor space with a notebook to investigate lighting conditions. Then, count how many hours of full sun each spot gets. Later, check if you’re dealing with clay or sandy soil. Also, watch where water pools after the rain.

This homework prevents years of frustration. Plus, plants that are suited to their location naturally resist disease and pests without sprays. They don’t sulk there begging for fertiliser monthly.

Replace the front yard with clover or native ground covers

Regular mowing takes weekends, but ground covers just sit there looking good.

Microclover, buffalo grass, native violet, or creeping thyme skip your mowing entirely. Unlike the grass, which demands mowing weekly during the growing season.

After two years, these alternatives create such thick growth that weeds can’t break through. They also handle hot weather and drought while neighbouring lawns turn brown.

Bees love clover too, so you’re helping pollinators while ditching your mower permanently.

Add hardscaping and permanent paths

Low-maintenance landscaping includes hardscaping for a beautiful space without constant care.

Use gravel, pavers, or decking to replace the garden beds. Otherwise, you’d spend hours weeding your paths every week.

Don’t forget to make your paths wide enough to fit a wheelbarrow comfortably. Those paths look cute at first, but wait until you’re trying to squeeze a bag of mulch. And plants will grab you from both sides.

Best plants for hands-off gardening

Now that you know the design basics, let’s explore low-maintenance garden ideas that actually deliver what they promise.

Native Australian plants that come back year after year

These plants bloom spring after spring without replanting, fertilising, or much watering from you.

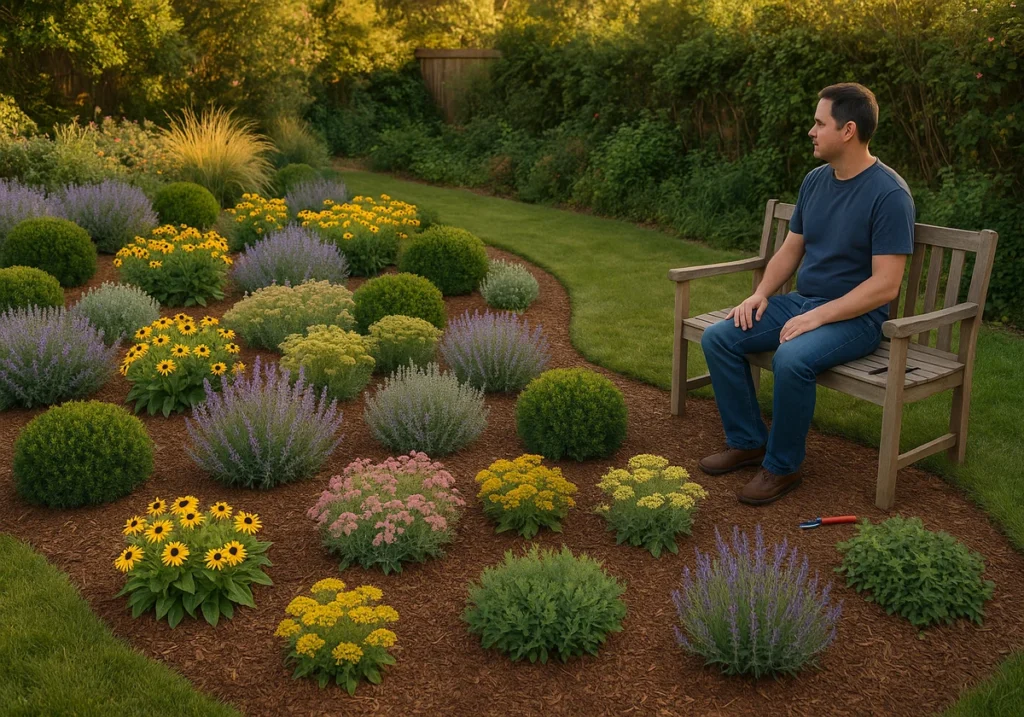
Catmint, black-eyed Susans, and sedum pop back up every year like clockwork in your garden beds. No replanting, no struggle. Because native plants already know how to handle your local weather, pests, and soil conditions. (You’re working with nature instead of fighting it.)

And, most of them bloom for weeks without needing deadheading. Instead, it gives you more time to enjoy your outdoor space.

Shrubs instead of high-maintenance flowers

One shrub does the work of 30 annuals you’d otherwise replant every single year.

A decent-sized shrub covers the same ground as 20-30 annuals you’d buy every spring. That saves hours and money on planting.

Evergreen plants like boxwood look sharp year-round without touching them. These shrubs rarely need dividing, and their deep roots find water underground. You simply need to cut them once a year.

Drought-tolerant plants for dry spots

Sun-loving plants that handle drought survive on rainwater alone after their first summer.

During hot weather, lavender, yarrow, and ornamental grasses handle dry patches without weekly watering. After one year, these tough drought-tolerant plants live on natural rainfall. Their deep roots dig down for moisture while you can enjoy weekends doing anything.

Plants you should avoid

Some plants look gorgeous at the shop, but add time-consuming weekly chores that you’ll regret.

For example, Roses demand constant attention with spraying and deadheading. Meanwhile, Bee balm and mint spread aggressively, forcing constant digging to control weed growth.

Our recommendation is to skip pest magnets and high-maintenance plants unless you genuinely enjoy your garden work.

Soil and mulch setup that prevents weeds

Soil and mulch setup

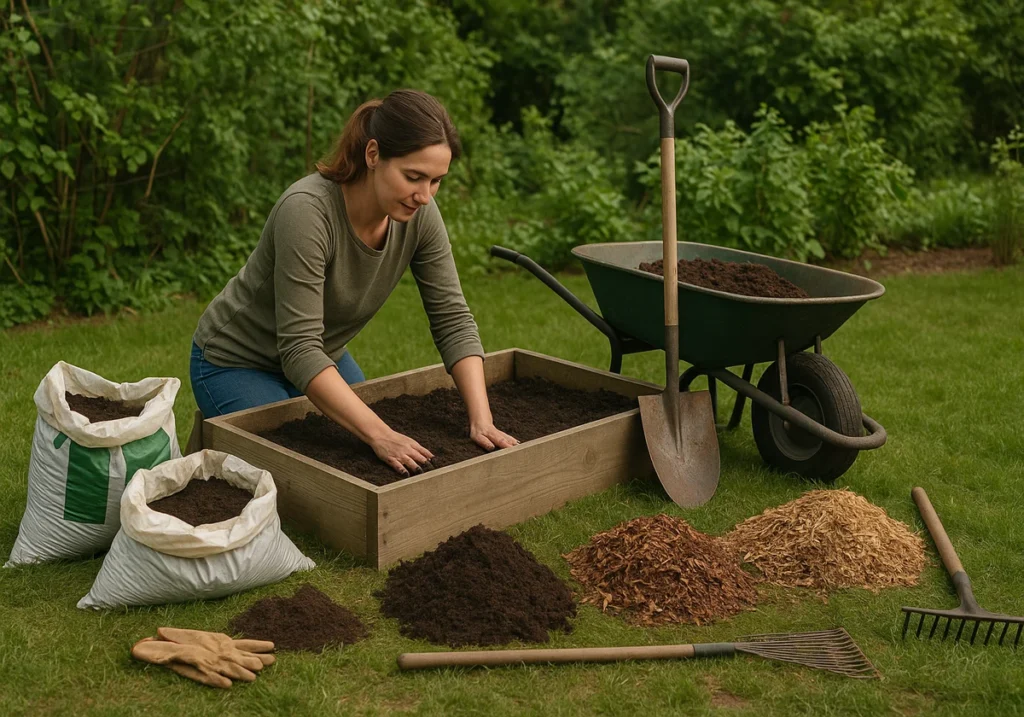
Getting your soil and mulch right at the start changes everything. Do this properly once, and you’ll skip most of the weeding that wastes your weekends.

Most people skip these steps and pay for it later with constant weed growth and thirsty plants in their garden beds.

Build nutrient-rich soil first

Rich soil feeds your plants naturally, so you don’t need to use fertiliser every month.

You can mix compost into your garden beds before planting. This helps soil to retain its moisture longer during dry and hot weather. Sites like Peninsula Compost can tell you more about this.

Apply thick mulch layers

A thick layer of mulch can stop weeds before they start to grow. For mulching, you can lay down 3 inches of wood chips or shredded leaves around your plants each spring.

As a result, it will block sunlight so that weed seeds can’t sprout. It also helps conserve soil moisture between rainfalls.

Final setup tasks that save hours each week

A couple of more quick setups you can follow. Then, you’ll spend more time enjoying your dream garden than working in it.

These tasks require minimal effort but save countless hours maintaining your outdoor space.

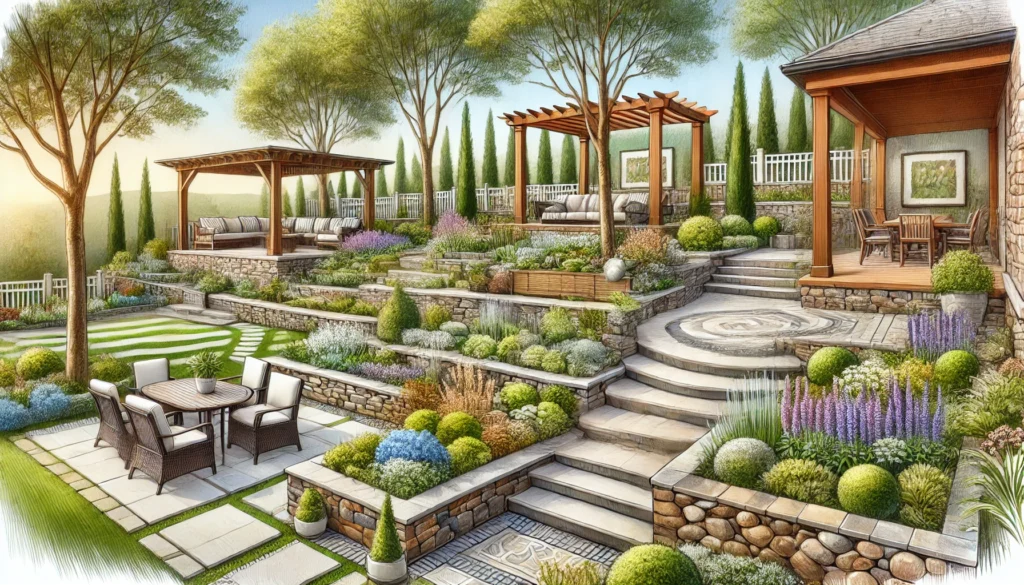
Group plants by water needs

Grouping plants by thirst level saves you from dragging hoses all over your garden beds.

Put thirsty plants together in one spot and drought-tolerant ones in another. So you’re only watering the zones that actually need it. That’s how less water usage and less effort make better results for every plant.
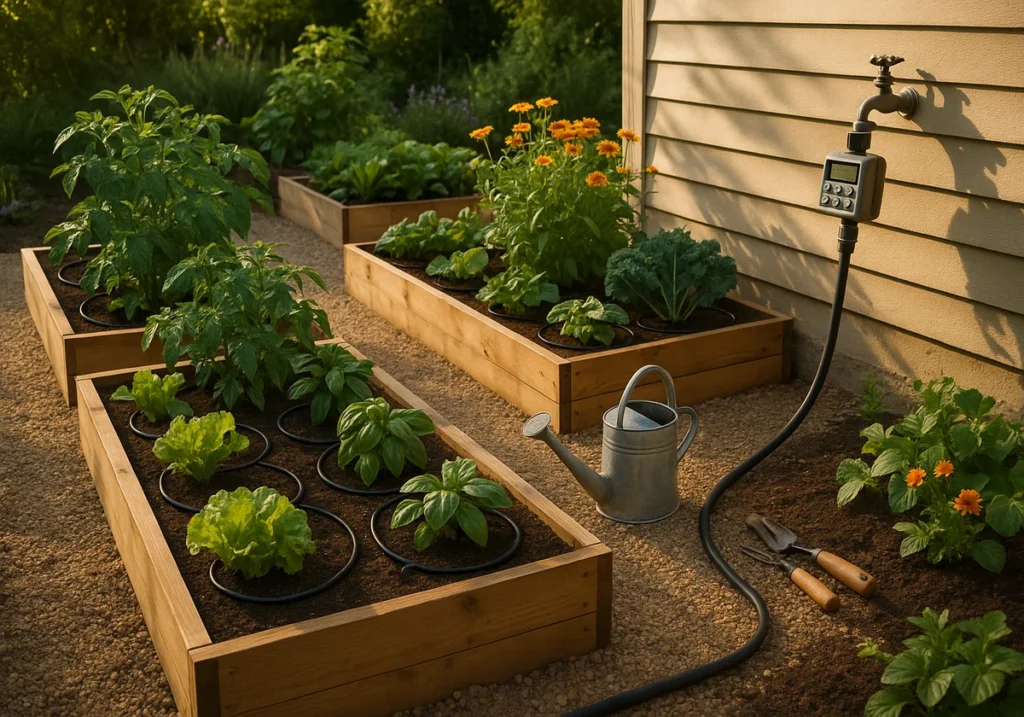
Install drip irrigation systems or timers

Irrigation systems with timers automate watering so you forget about it completely.

Drip irrigation delivers water right at plant roots instead of spraying everywhere. This means plants receive exactly what they need with zero waste.

drip irrigation systems or timers

Start your low-maintenance garden today

Building a low-maintenance garden starts with the correct choice. A few native plants, thick mulch, and an irrigation system can change your outdoor space into something amazing with minimal effort.

You are still confused about how to plan all this? Here we are at Peninsula Compost, creating landscaped gardens with beautiful designs, focusing on the people who will enjoy them.

So, don’t forget to reach out to us if you are struggling with your low-maintenance garden planning.

low maintenance garden design

How to Design a Low-Maintenance Garden That Still Looks Amazing

Does the thought of spending every weekend mowing, weeding, and watering your garden give you a headache? Join the club.

You’d be surprised at how many Australians love the idea of having a garden but hate the idea of having to do all of the dirty work!

Don’t worry, with a well-designed, low-maintenance garden, you can enjoy both your time and a beautiful outdoor space. With these tips, you’ll only have to “work” (we use that term lightly), 2 hours per week or less.

In this guide, we’ll walk you through time-saving strategies, low-effort plants, and clever layout tips to help you reclaim your weekends while still having a garden that makes the neighbours jealous.

First, let’s understand what makes a design low maintenance.

The Basics of Low-Maintenance Garden Design

The #1 factor in keeping your garden low-maintenance is thoughtful design. You need to plan ahead and select the right layout, plant groupings, and materials or else you’re going to be breaking back every weekend.

We recommend creating a structure that follows the 80/20 rule, where most of your time ends up going to just a few high-maintenance plants or tricky spots in the garden. Get rid of those, and you’ll cut down your workload big time.

Here’s where to start:

Start with Symmetrical Layouts

Ever wonder why formal gardens always look so neat with such little effort? It’s all in the layout. Symmetrical, geometric designs are naturally easier to manage. Their clean lines and repeated patterns make trimming and tidying simple.

How to Design a Low-Maintenance Garden

For example, two matching rectangular beds on either side of a path are way easier to keep up than a bunch of scattered, odd-shaped plantings.

Group Plants by Care Requirements

Think of your garden in zones, much like you’d organise your home. This means:

  • Keeping thirsty plants like hydrangeas or ferns in naturally damp spots or near your watering system.
  • Grouping drought-tolerant ones like lomandra, rosemary, or kangaroo paw where the soil drains well.
  • Setting aside a space for higher-maintenance plants like buxus or wisteria that need regular pruning.

This simple zoning trick, called hydrozoning, can cut your water use by 30-50% and make garden upkeep way easier.

Choose Materials That Reduce Weeding

You want to choose smart materials if you’re aiming for both performance and durability. We recommend choosing gravel paths with good weed barriers underneath, solid pavers set on compacted sand, and well-placed stones. They not only look great but also help keep weeds out.

For the absolute best results, go with angular gravel (like decomposed granite) instead of smooth pebbles. It locks in place better and gives you a sturdier path to walk on.

The best part of this approach is that your garden looks polished and put-together while needing minimal upkeep, which is exactly what we’re after. A properly mulched garden can also reduce maintenance by up to 60%, helping your smart choices pay off even more over time.

But the biggest time-saver? Choosing the right plants from the start.

Top Plants for a Low-Maintenance and Beautiful Garden

Now for the fun part: choosing plants that will reward you with years of beauty without constant babysitting. The secret to it is thinking like a lazy gardener (in the best possible way) and selecting plants that practically grow themselves.

Horticulturists group plants based on how long they take to settle in and how much care they need. You’ll want to pick those rated as “low input, high impact.” Let’s look at your options.

Maintenance-Free vs High-Maintenance Plants

Some plants require frequent care to stay healthy, while others are hardy, requiring minimal attention. For instance, hybrid tea roses need weekly fungicide, and bedding plants have to be replanted every season.

You want to skip those and go for perennials that bloom for a long time or shrubs that keep their shape without much pruning. We recommend ornamental grasses like stipa tenuissima as they look great even when they’re not in bloom.

Reliable Plants for the Australian Climates

If you’re gardening in Australia, you’ve got some amazing native plants that handle our tough climate well:

  • Callistemon (bottlebrush): These are stunning red blooms with papery bark and needle-like leaves that survive on just 300mm of annual rainfall after settling in.
  • Lomandra longifolia: A fine-textured foliage year-round that handles both drought and waterlogging perfectly.
  • Anigozanthos (kangaroo paw): Known for its exotic blooms, like the ‘Bush Ranger’ variety, it flowers for 6 to 8 months and faces almost no pest problems.

Companion Planting for Natural Health

Here’s a smart trick permaculture experts love: plant combinations that help each other out naturally. For example, grouping Mediterranean herbs like lavender, rosemary, and santolina creates fragrant barriers that keep common pests away, and all need the same kind of care.

So if you mix plants with different root depths, like shallow groundcovers and deep-rooted shrubs, they each get what they need from the soil without competing, and you don’t have to feed them as much.

Now, imagine pairing those resilient plants with features that never need watering or weeding. Let’s look at the design elements that’ll make your garden low-maintenance.

How to Use Hardscaping for Easy Care

Want to know the real secret behind those picture-perfect gardens that never seem to have a weed? They use hardscaping to do most of the work, while plants add the finishing touches. Pro designers know that focusing on hardscaping gives you the biggest visual impact with the least amount of upkeep.

Here’s all you need to know to get started with hardscaping:

Raised Beds, Edging, and Retaining Walls for Control

Raised beds are a smart and stylish choice for low-maintenance gardening. They take care of common problems like poor drainage, tricky soil, and weeds all at once. Timber sleeper beds are also a good option (at least 200mm high) due to their great drainage and defined edges that help keep grass from creeping in.

How to Use Hardscaping for Easy Care

Steel or concrete edging works well too if you’re going for an even cleaner look. It creates tidy lines that mower wheels can follow, which means you can skip the time-consuming hand-trimming that usually takes up 30-40% of your garden maintenance.

Gravel Garden Ideas to Replace Lawn-Heavy Designs

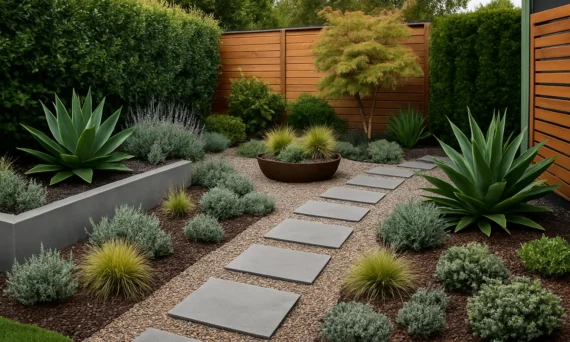
Next, think about swapping out high-maintenance lawn areas for gravel gardens with 10–20mm decorative stones. Decomposed granite in warm tones makes a great backdrop for bold plants like Agave attenuata or Miscanthus sinensis, and it drains way better than heavy clay soil.

Just make sure to lay down a weed mat first and add metal or concrete edging to keep the gravel in place. It’s these little details that separate professional-looking installations from DIY.

Choosing Between Decking, Paving, and Pebbles

Each hardscaping option has its sweet spot based on your specific conditions:

  • Composite decking: Skips the yearly timber oiling, making it a low-maintenance choice. To avoid long-term issues, ensure there’s adequate airflow underneath to prevent trapped moisture.
  • Concrete pavers on sand: Easy to adjust if the ground shifts, which makes them great for DIY projects. They’re especially handy in areas prone to movement, as you can lift and re-level them without much fuss.
  • Natural stone: Super long-lasting, which gives it a timeless appeal. But in regions with freeze-thaw cycles, sealing is essential to prevent cracks and weather damage.
  • River pebbles (40–60mm): Great for dry creek beds and mulched spots. Without proper edging, though, they tend to scatter into lawns or paths over time.

Choosing hardscaping materials like these further reduces the time spent on upkeep. In fact, with hardscaping taking the lead in your garden design and plants playing supporting roles, you can cut your yard work by up to 90%.

But even the toughest plants and best designs need water, and that’s where we’re headed to in the next section.

Easy Ways to Cut Time-Consuming Watering with Smart Irrigation

It’s time to tackle that nagging worry about keeping everything alive without becoming a slave to the garden hose. Thanks to modern irrigation technology, smart controllers can cut water usage by 20-50% and help your plants thrive by keeping moisture levels just right.

Let’s take a look at how these systems make gardening easier and more efficient.

Drip Irrigation, Soil Moisture Sensors, and Timers

First up are drip irrigation systems that deliver water directly to the plant roots at a gentle rate of 2 to 4 litres per hour. Compared to sprinklers that are only 65-75% efficient, drip irrigation can go up to 90%.

You can take it a step further with soil moisture sensors (like the Hunter Solar Sync or Rain Bird SMRT-Y), which adjust watering based on real-time soil conditions instead of fixed timers. There are also WiFi-enabled controllers, like the Rachio 3, that learn your garden’s needs and use weather forecasts to skip watering when it’s not necessary.

Rainwater Harvesting and Water-Wise Layout Tips

While smart controllers are great, you can save even more water by paying attention to your garden’s natural watering needs.

Start by placing your thirstiest plants, like ferns and impatiens, in naturally damp spots. This means north-facing areas with morning sun and afternoon shade or gentle slopes that catch runoff from your roof. To make the most of this natural water, a 5,000-litre rainwater tank can collect enough from a 100m² roof to keep a small garden going through most dry spells.

Don’t forget to connect your rainwater system to automated irrigation. This helps us use the water efficiently and reduces our main water use.

But if you’re serious about a low-maintenance garden, why stop at smart watering? Let’s take it a step further by choosing sustainable practices.

Eco-Friendly Gardening Tips That Save You Time and Money

Here’s where being environmentally conscious and being a lazy gardener perfectly align. What we mean here is that sustainable gardening practices are also the easiest to maintain. So, you’re naturally going to save time and effort by using Nature’s super efficient systems.

Eco-Friendly Gardening Tips

Let’s have a look at why sustainable gardening works so well.

Mulch Benefits for Weed Suppression and Water Retention

A 75-100 mm layer of quality organic mulch is like hiring a full-time garden assistant. Chunky hardwood mulch can block out 85-90% of yearly weeds and cut soil water loss by up to 70% on hot days.

The trick is picking the right mulch for your plants. Acid lovers like azaleas do well with pine bark mulch, while Mediterranean plants like gravel because it doesn’t hold extra moisture around their bases.

Composting at Home

Don’t let composting scare you off. Even a simple three-bin setup made from pallets can handle your kitchen scraps easily. To keep it odour-free, you just have to maintain the correct carbon-to-nitrogen ratio (30:1), which is roughly three parts brown materials (leaves, paper) to one part green materials (kitchen scraps, grass clippings).

We recommend hot composting at 55-65°C since it kills weed seeds and breaks down stuff in just 6 to 8 weeks, instead of the 12 to 18 months cold composting needs.

No-Dig Garden Beds: Less Work, Better Results

If you’ve never heard of no-dig gardening methods, it involves layering organic matter directly on top of existing soil, copying the way a natural forest floor works.

This method builds soil carbon, helps the soil hold 40-60% more water, and saves you from the hard work of double-digging. You can try the lasagna method (alternating layers of carbon-rich and nitrogen-rich materials) to create a rich soil in just one season while suppressing existing weeds completely.

These sustainable practices are a win-win all around. They make gardening easier for you and better for the environment, so there’s no reason not to give them a try.

Now, it’s time to make sure your outdoor space fits your lifestyle, not the other way around.

Tips for Creating a Garden That Matches Your Lifestyle

Here’s a quick reminder as you’re reading this: gardening shouldn’t take over your life. The best low-maintenance gardens are built around how you want to use your outdoor space, something landscape architects call “program-driven design.”

Here’s what you need to know about making your garden work for your lifestyle.

Outdoor Spaces for Effortless Enjoyment

Try setting up clear zones for different activities by paying attention to the sun and views. For example, a morning coffee spot works best with eastern sun and some wind shelter. But evening hangouts are perfect with western views and some shade overhead.

Our usual recommendation is to add paved areas around outdoor kitchens or fire pits. This helps keep muddy feet and grass damage away, and they only need an occasional clean to stay looking good.

Furniture, Fire Pits, and Pergolas as Design Anchors

You can always use permanent features as the focal points of your garden to reduce the pressure on plants to provide all the visual interest:

  • Built-in seating area: Use concrete blocks with timber caps to make low-maintenance seating that stays put all year.
  • Gas fire tables: Lava rock surrounds can give you a fun outdoor spot without the hassle of wood or ash cleanup.
  • Steel pergolas with climbing wires: This can add instant structure and support minimal-care climbing plants.
  • Deciduous vine pergolas: Plants like Parthenocissus quinquefolia offer natural summer shade and winter sun without any extra work.

Making Your Space More Practical with the Right Plant

You already get it by now that low-maintenance gardening equals a space that feels natural (and lets you embrace your laziness). So it’s only natural to choose tough plants that bounce back easily.

Ornamental grasses and succulents handle soccer balls and pets better than fragile perennials. To keep things tidy, you can add practical storage like weatherproof deck boxes that can also be used for extra seating, so your garden tools are close by but out of sight.

If you’ve stuck with us this far, here’s a secret: the best low-maintenance gardens often break the usual landscaping rules. They pick one standout feature and keep everything else simple. This way, they make a bigger visual impact than gardens trying to do too much at once.

Now that you’ve got the know-how, it’s time to put it to work.

Final Tips for a Low-Maintenance Backyard

Ready to start changing up your outdoor space? Pick one part of this guide and work on it this month. Maybe set up a simple drip irrigation system or swap out that tricky lawn area for gravel and easy-care plants.

Remember, your low-maintenance dream garden is possible when you work with nature instead of against it. Your future self will thank you for every smart choice you make today.

Ultimate Garden Renovation Tips: Transforming Your Space

Ultimate Garden Renovation Tips: Transforming Your Space

Creating a personal oasis in your garden is more than just an aesthetic endeavour; it’s about crafting a sanctuary that blends beauty, functionality, and peace. For many homeowners, however, the journey to achieving this dream often feels overwhelming. From selecting the right plants to tackling outdated layouts, the challenges can seem endless.

If you’ve ever stared at your outdoor space wondering where to start, you’re not alone. The problem often lies in the lack of a clear plan or inspiration, which can leave even the most ambitious renovators feeling stuck. That’s where this guide steps in. With practical advice and creative ideas, we’ll help you navigate the complexities of garden renovation and turn your outdoor space into a haven of tranquillity and style.

Imagine a garden that doesn’t just look stunning but also works seamlessly for your lifestyle — whether it’s hosting family barbecues, relaxing with a book, or cultivating a space that supports biodiversity. Throughout this post, you’ll find actionable tips and inspiring ideas to transform your garden into the personal oasis you’ve always wanted. Let’s dive in and tackle those renovation roadblocks together.

Planning Your Garden Renovation: The Foundation for Success

Before starting your garden renovation, it’s essential to lay a strong foundation through thoughtful planning. This stage ensures your project is not only aesthetically pleasing but also practical and aligned with your needs.

Planning Your Garden Renovation: The Foundation for Success

1. Define Your Goals and Vision

Start by identifying what you want from your garden. Is it a space for entertaining, a quiet retreat, or a vibrant ecosystem for plants and wildlife? Clearly defining your goals will guide every decision you make, from layout to plant selection.

2. Assess Your Space

Take a thorough look at your current garden. Analyse factors like sunlight, shade, drainage, and soil type for optimal planning. For example, sunny areas are ideal for flowerbeds, while shaded corners could host seating areas or ferns. Use grid paper or a digital design app to map your garden’s existing features and identify opportunities for improvement.

3. Create a Budget and Timeline

Setting a realistic budget is essential. Allocate funds for key components such as plants, hardscaping, furniture, and lighting. Additionally, develop a timeline that breaks the renovation into manageable phases, ensuring you can tackle each part without feeling overwhelmed.

4. Prioritise Sustainability

Consider eco-friendly options right from the planning stage. For instance, choose native plants that require less water, or plan for a rainwater harvesting system to irrigate your garden. Sustainable practices not only reduce environmental impact but also save money in the long term.

Insightful Tip: Gather inspiration from garden design magazines or online platforms like Pinterest. Collect ideas that align with your vision and incorporate them into your personalised renovation plan.

Design Ideas for a Garden Oasis

Crafting a garden oasis involves blending aesthetics with functionality to create a space that rejuvenates the senses and caters to your lifestyle.

1. Incorporating Functional Layouts

Zoning your garden is key to making it both beautiful and practical. Dedicate areas for lounging, dining, and play. Use pathways made of gravel or stone to separate these spaces. For instance, a paved area for outdoor dining can flow into a grassy section for relaxing or a play zone for children.

2. Adding Water Features for Relaxation

A water feature can instantly elevate your garden’s ambience. Options range from simple birdbaths to cascading fountains or ponds. For sustainability, choose solar-powered water pumps to keep your energy usage low. A small, well-placed fountain near seating areas can create a soothing atmosphere for relaxation. According to Gardenista, incorporating water features enhances engagement and creates a calming environment for visitors (gardenista.com).

3. Selecting the Right Outdoor Furniture

Opt for furniture that complements your garden’s theme. Weather-resistant pieces made of materials like teak or rattan are excellent for longevity. For smaller spaces, foldable or stackable furniture helps save room while providing flexibility. Enhance comfort with cushions and throws in natural, earthy tones. The Royal Horticultural Society recommends matching furniture style with your garden’s layout for a cohesive design (rhs.org.uk).

Selecting the Right Plants for Your Garden

The plants you choose can transform your garden into a vibrant and sustainable sanctuary.

1. Plants for Your Climate and Soil

Select plants that thrive in your local environment. Native species are often low-maintenance and eco-friendly. For example, lavender and rosemary flourish in sunny, dry areas, while ferns and hostas thrive in shaded, damp conditions. Test your soil to determine its pH and texture, ensuring it suits your chosen plants. The RHS suggests hardy plants like Echinacea purpurea for UK gardens as they attract pollinators and thrive with minimal care (rhs.org.uk).

2. Layering and Colour Schemes

Create depth by layering plants of varying heights. Use taller plants like ornamental grasses or small trees at the back, medium-height shrubs in the middle, and low-growing flowers or ground covers in the front. For a cohesive look, stick to a colour scheme, such as pastels or vibrant, contrasting hues.

3. Low-Maintenance Options

Perennials and drought-tolerant plants are ideal for reducing upkeep. Mulching around plants helps retain moisture and suppress weeds, saving time and resources. According to BBC Gardeners’ World Magazine, perennials grow quickly and provide lasting beauty, making them a practical choice (gardenersworld.com).

Hardscaping and Functional Features

Hardscaping provides the structure and functionality your garden needs to shine.

Hardscaping provides the structure and functionality your garden

1. Defining Spaces with Hardscaping

Materials like stone, gravel, or concrete can be used to create patios, pathways, and retaining walls, adding structure and style. Raised garden beds not only add visual interest but also make gardening more accessible. Use natural materials to maintain harmony with the surrounding greenery.

2. Practical Additions

Enhance functionality with features like outdoor kitchens, fire pits, or pergolas. For instance, a pergola with climbing plants can provide shade while adding a touch of elegance. Consider modular furniture that adapts to different uses, like benches that double as storage.

Creative Decor and Personalisation

Your garden should reflect your style and creativity.

1. DIY Decor Projects

Repurpose old items into unique garden ornaments. For example, turn an old ladder into a tiered plant stand or use painted terracotta pots as vibrant accents. These projects not only save money but also add character to your garden.

2. Statement Pieces

Add focal points like sculptures, large planters, or a decorative trellis. Choose pieces that align with your garden’s overall theme, whether modern, rustic, or tropical.

3. Seasonal Decorations

Rotate decor elements with the seasons. Add fairy lights or lanterns in winter and colourful bunting or cushions in summer to keep your garden looking fresh and inviting year-round.

Lighting and Atmosphere

Lighting can transform your garden’s ambience, making it functional and magical even after sunset.

1. Layered Lighting

Combine different types of lighting for a balanced effect: solar lights for pathways, string lights for seating areas, and spotlights to highlight trees or water features. The layering creates depth and enhances the mood.

2. Eco-Friendly Options

Choose LED or solar-powered lights to reduce energy consumption. Motion-sensor lights can add security without being intrusive.

3. Creative Touches

Incorporate lighting as part of your decor. For instance, fairy lights can be placed in jars for a whimsical effect, or lanterns can be used to frame entrances and pathways.

Maintaining Your Renovated Garden

Consistent care ensures your garden remains a thriving oasis.

Consistent care ensures your garden remains a thriving oasis

1. Regular Upkeep

Set a schedule for essential tasks like watering, pruning, and fertilising to ensure your garden stays vibrant. Inspect plants regularly for pests or diseases and address issues promptly.

2. Seasonal Adjustments

Adapt your garden to changing seasons. Plant seasonal flowers, add mulch in colder months, and rotate decor to keep the space inviting throughout the year.

3. Sustainable Practices

Implement eco-friendly maintenance techniques. Compost kitchen and garden waste to enrich the soil, and collect rainwater for irrigation. Encourage biodiversity by adding features like bird feeders or bee hotels.

Your Garden Oasis Awaits

Your dream garden is closer than you think. By combining thoughtful planning, creative design, and sustainable practices, you can transform your outdoor space into a personal sanctuary that enriches your daily life. Whether you’re lounging by a bubbling fountain, hosting friends under a pergola, or enjoying the sight of thriving plants, your garden can become a true extension of your home.

Don’t let the journey stop here. Start by sketching out your ideas or visiting local garden centres for inspiration. If you need expert advice or tailored solutions, reach out to landscaping professionals who can bring your vision to life. Your oasis awaits — let’s make it a reality today.

From Drab to Fab: The Power of Landscaping in Curb Appeal

What is the first thing you notice when you drive up to a home? That’s right – it’s the curb appeal! From large weeping willows, carefully manicured shrubs and cool walkways to succulent gardens wrapped in stone walls – a well-landscaped property can instantly increase your perception of value and create an eye-catching appearance. This article provides an overview of what landscape design components could potentially add “curb appeal” along with providing hints on how to make it look your own. Let’s explore together how landscaping can take any drab yard from dull to dynamic with style!

Why landscaping is essential for curb appeal

The exterior of your home can be just as important as the interior, and the first thing people notice when they see your house is the landscaping. Landscaping is essential for curb appeal because it enhances the overall appearance of your property. A well-designed landscape can not only add aesthetic appeal but can also increase the value of your home. You want your home to stand out and make a great first impression, and having a beautiful yard can do just that. So, whether you are trying to sell your house or simply want to enjoy the beauty of nature right outside your door, investing in good landscaping is a smart move.

How to choose the right plants for your home

Transforming your home into a green paradise can be a fulfilling experience, but choosing the right plants for your space can be overwhelming. It’s important to consider the amount of light your plants will receive, the humidity levels in your home, and the amount of care required for each plant. If you’re a beginner, it’s best to start with low-maintenance plants such as succulents or snake plants, before moving on to more advanced plants. Take the time to research each plant before purchasing to ensure that it aligns with your home’s environment and your own personal preferences. By carefully selecting the right plants for your home, you can create a lush oasis that adds both beauty and tranquility to your living space.
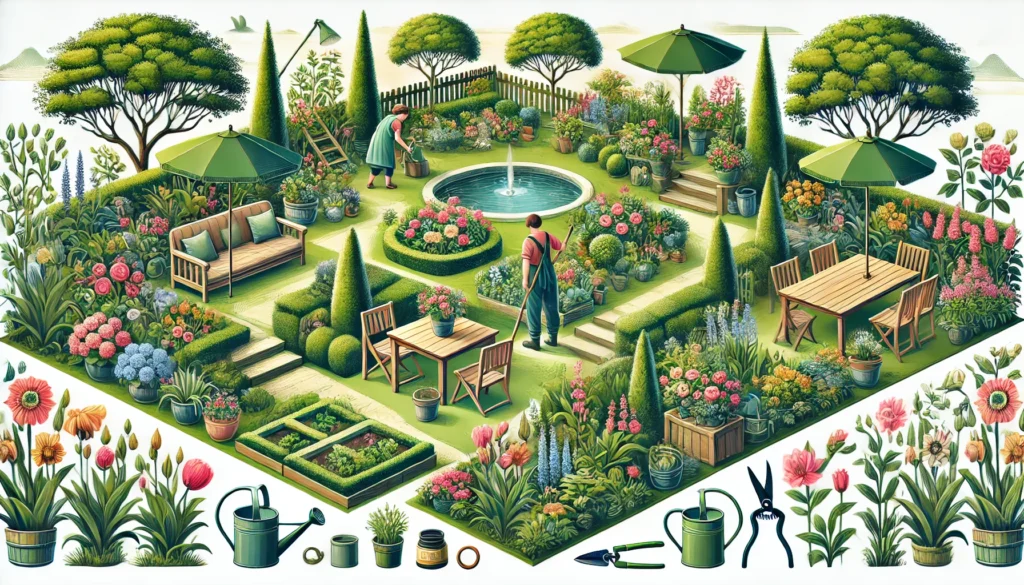
What types of soil are best for landscaping

When it comes to creating a beautiful landscape that is both pleasing to the eye and healthy for plants to thrive in, selecting the right type of soil is crucial. Different soils have varying physical and chemical properties, making them suitable for different landscaping projects. For instance, sandy soil is great for drainage and ideal for plants that need well-draining soil, while loamy soil is enriched with nutrients, making it the perfect option for growing vegetables and flowers. Clay soil, on the other hand, is best for retaining water and making it available to plants for a longer period. Ultimately, the best soil for your landscaping project will depend on factors such as the type of plants you intend to grow, the climate in your region, and the overall design of your landscape.

The benefits of adding a water feature or garden path

There’s nothing quite like the tranquility of a water feature or the peacefulness of a garden path. Adding these elements to your outdoor space not only creates a soothing atmosphere but can also provide numerous benefits. A water feature, whether it’s a tranquil fountain or a calming pond, can help to reduce stress levels and promote relaxation. A garden path, on the other hand, is not only aesthetically pleasing but can also help guide you through your garden, allowing you to fully appreciate all that nature has to offer. Both of these features can also add value to your property, making them a wise investment for any homeowner. So why not enhance your outdoor space and reap the benefits of a water feature or garden path?

Tips for creating an overall sense of unity and flow in your landscape design

Landscape designing can be a tricky task, especially when it comes to creating an overall sense of unity and flow. To make your outdoor space look like an extension of your home, you need to incorporate some design techniques that can help you achieve that seamless look. One of the essential tips is to use repetition in your design. Repeating colours, forms, and textures will create continuity and coherence throughout your landscape. Creating a focal point in your design will also provide a sense of balance and draw the eye to key areas of your yard. By thoughtfully integrating elements such as hedges, planters, and garden furniture, you can seamlessly tie together and unify the most disparate of landscapes.

DIY projects that can help spruce up your yard on a budget

Sunny weather and beautiful landscaping go hand in hand. However, expensive landscaping projects can sometimes be out of reach. Fear not! With a little creativity and a modest budget, you can spruce up your yard with DIY projects that are both easy and affordable. Whether it’s adding colorful flowers to brighten up the space or creating unique garden features like a relaxing hammock or a stylish walkway, the possibilities are endless. By doing these projects yourself, not only will you save money, but you’ll also add your personal touch to your outdoor space. So grab your gardening gloves and get started on your DIY journey to a beautiful yard.

Landscaping is a great way to add value to any property while also improving its overall aesthetic. Whether you are looking for an affordable DIY project or professional assistance with creating a unique landscape design, it’s important to think carefully about the needs of your home and how best to maximise available space. Ultimately, choosing the right soil, plants, and features can help to create a tranquil atmosphere in which you can enjoy spending time outdoors. With a few simple steps and some creative thinking, you too can have that perfect oasis no matter what your outdoor budget is! So why not get started today by learning more about landscape design and beginning the process of creating the perfect outdoor living space?